Show Posts

This section allows you to view all posts made by this member. Note that you can only see posts made in areas you currently have access to.


Messages - dngspot

Pages: 1 [2]
16
User Projects & Pictures / Re: My Roger Sanders Waste Oil Heater
« on: February 03, 2009, 06:11:15 pm »
Thanks Russ.

The new damper is in and is working great. Start up was easy. As far as running it I just open until it starts to go out then close when the center of the puddle is stabilized.
Here are the modifications.


17
User Projects & Pictures / Re: My Roger Sanders Waste Oil Heater
« on: February 01, 2009, 08:08:57 pm »
…A busy week end. My wife had me install a storm door. Who would have thought that Anderson could make a simple project difficult and time consuming? It took most of the afternoon on Saturday.

Sunday was mine. I gathered up the remaining stuff that I thought I needed for the chimney. Yet still make half a dozen trips to the local home centers. I could not believe the simple items I needed are not at one store I had to go to both Home Depot and Lowe’s to complete the project. But it is done and I am happy it works.

The chimney drafts incredibly well, almost too well.  It is 12 feet long and is about 1 foot taller than my ridge line. I also installed a dampener in the stack. Starting is not as simple as it was in the back yard. I have to let the oil heat up with the door open for about 10 minutes. I also have to restrict the air intake longer or the fire will blow out. After every thing is heated I can control the air intake with the flue dampener. I am going to make a variable cover for the intake tomorrow.

I ran for about 45 minutes. I got it pretty hot and the paint started to smoke and smell. I tried to do this out side but could not because the weather was too cold and the oil would not flow.  It heated the shop pretty quickly but the temp outside was pretty warm today, 40 degrees.

I am eager to start tweaking it for my needs now that I have it functional inside.


18
User Projects & Pictures / Re: My Roger Sanders Waste Oil Heater
« on: January 29, 2009, 07:08:09 am »
In that pic you see about a 50% burn. I was having trouble with the temp and oil flow. In the pics with the heater unpainted those are burning almost to the point the burner is overflowing. The amount of smoke is far less than the diesel engines that I work on day to day.

19
User Projects & Pictures / Re: Roger Sanders Waste Oil Heater
« on: January 26, 2009, 02:57:46 pm »
After its first run. I can put my hand on the top only for a second before the burning is too strong.
It was difficult to start only because the oil was so cool that I could not get a drip. This is out side with a strong wind. The wind is so strong that during heat up the flame would go out until I put a 2 inch reducer on the air intake. It seems burn better with it there so I will leave it.
I did not bring home the inferred thermometer but, it is hot. More testing is needed to see how it performs over the long run. I think I need to get it out of the wind so the heater keeps the bucket with the oil warm.

Here are the pics.

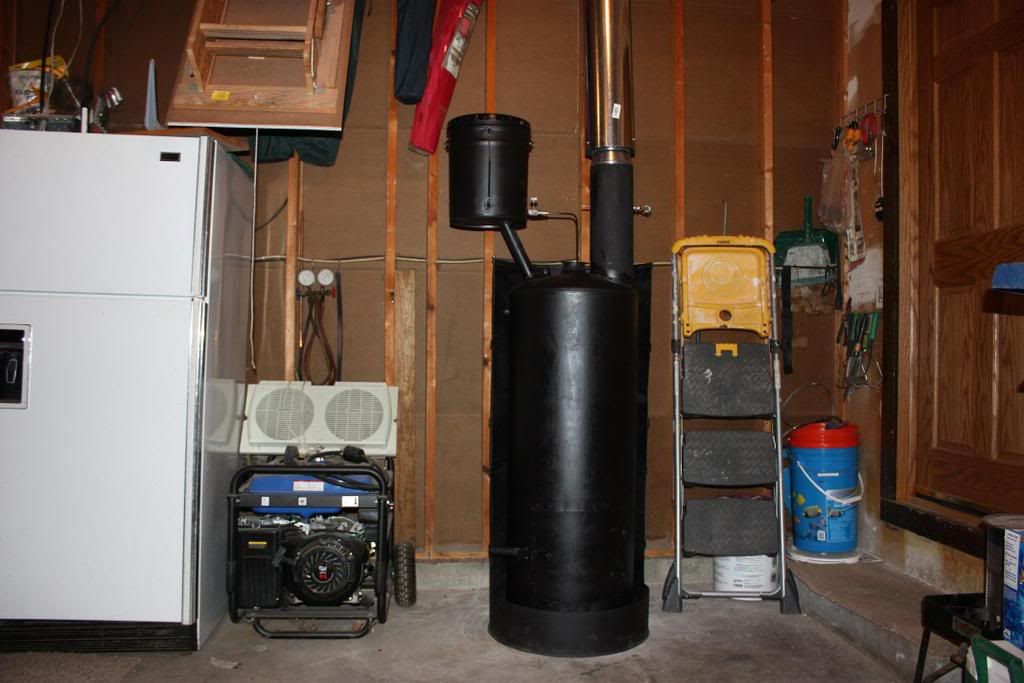
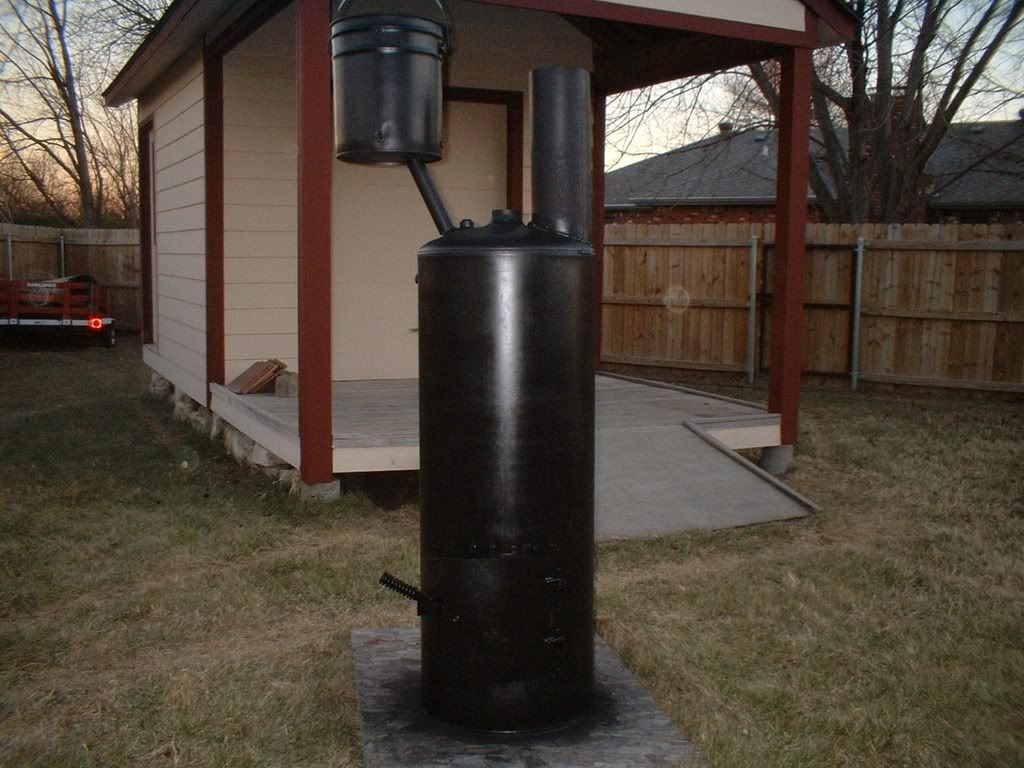
The stack and bucket. This shows how dark the exhaust is. Difficult to see and does not stink like burning oil.


The completed unit undergoing its first run. Look closely you can see a bit of exhaust.


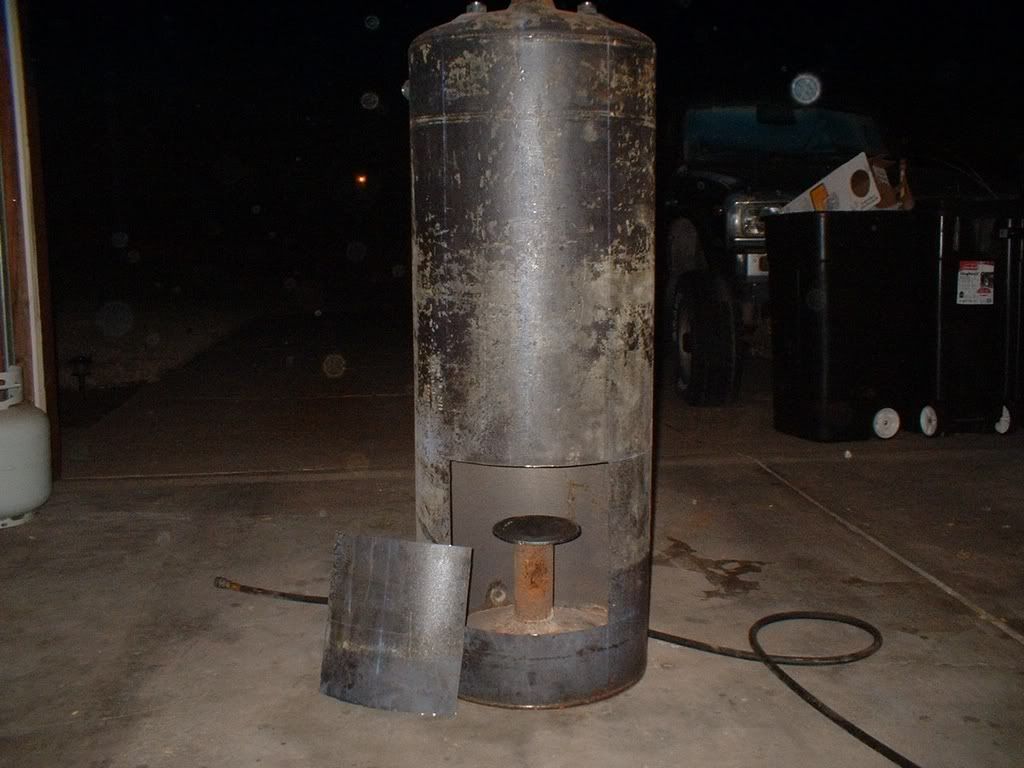
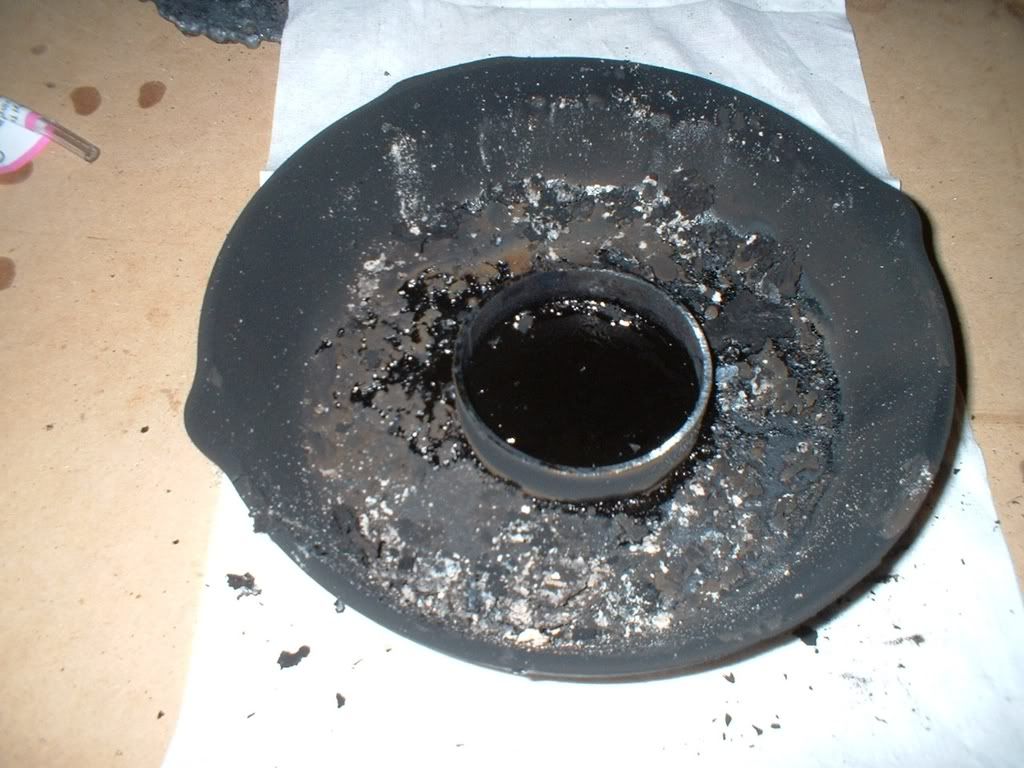
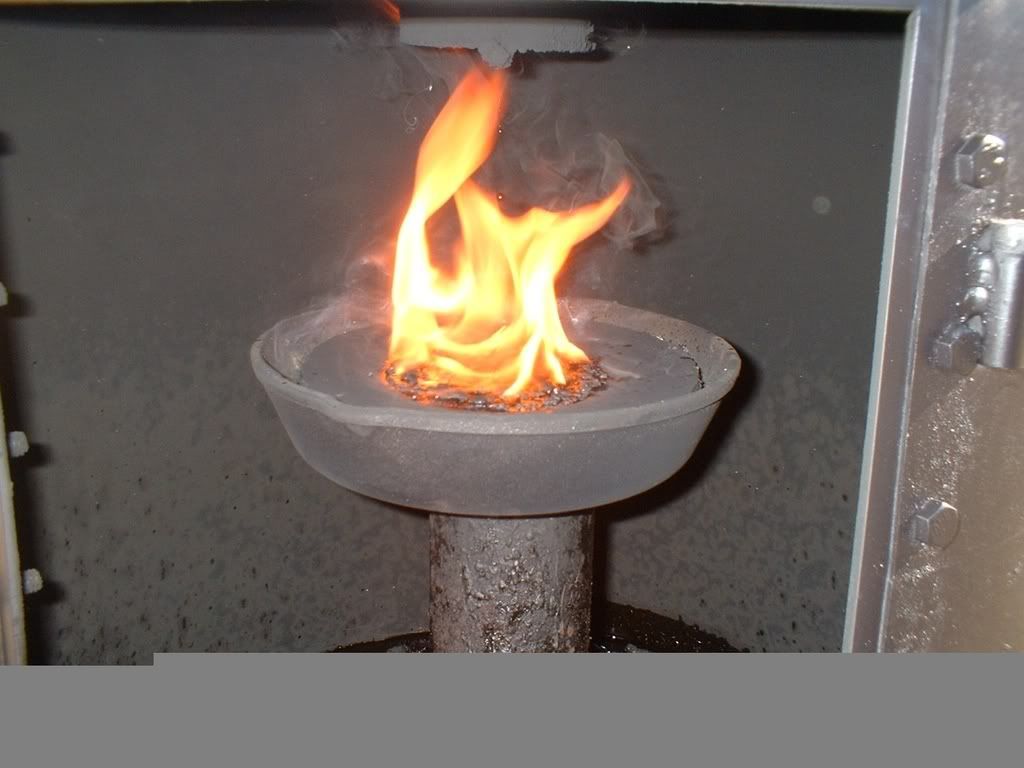
After running for about 6 hours, this is what I have learned. It used 1 gallon of oil at high burn. The conical burner and air make the flame form a cone that hits the walls of the heater. The draw back of the conical burner is, at top burn it can overflow and make a mess at the bottom of the heater. My solution is to add a 8 inch cast iron pan under the burner. I cut a ring from the piece that I cut from the old flue and set it in the pan and then set the burner on the ring. It worked better than I thought it would. If any oil spills over, the oil in the pan catches on fire and heats the burner from below. One thing that is a drag, the pan too will need to be cleaned.
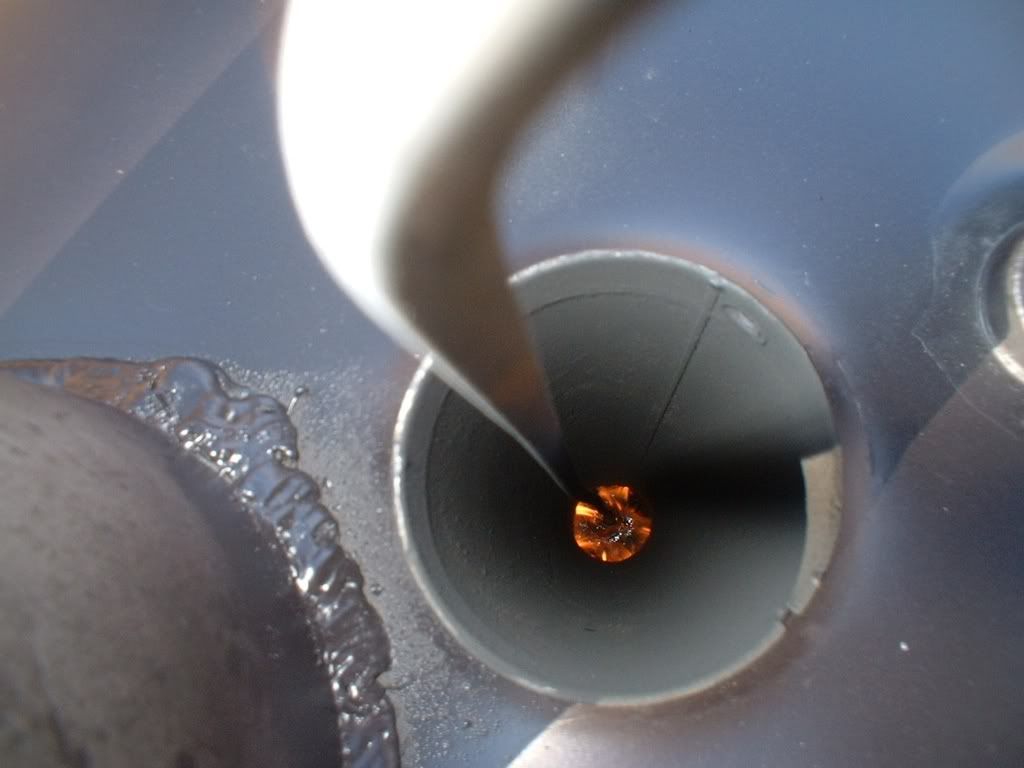
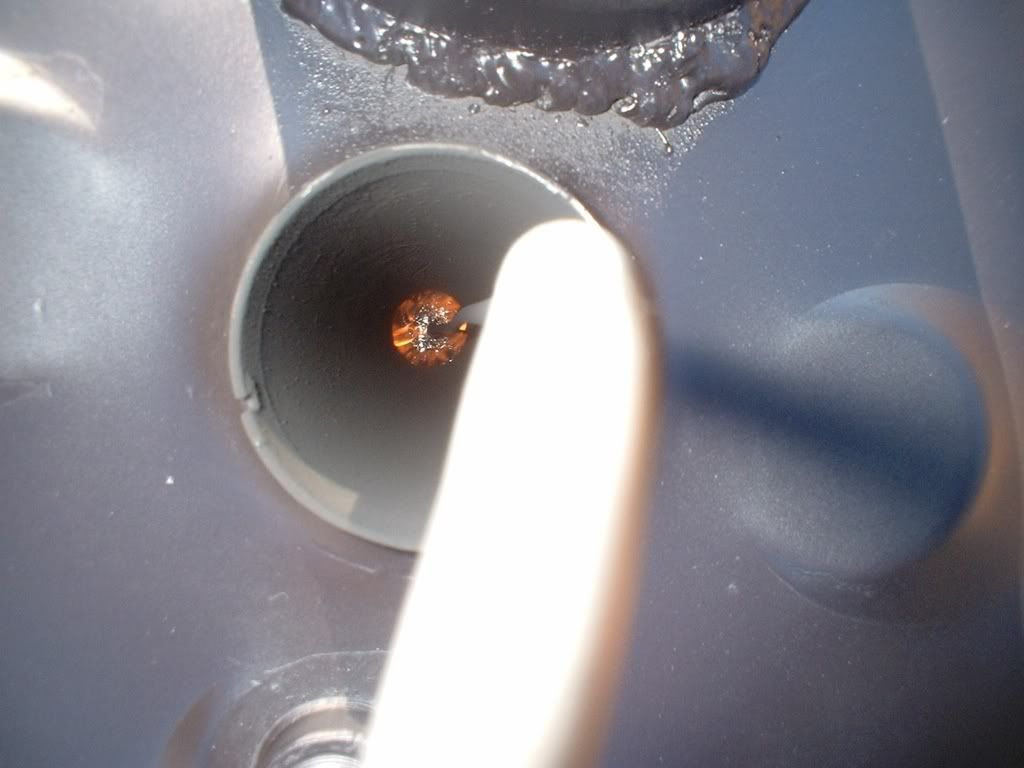
The heater gets dang hot and is fully adjustable from a high heat to a low heat. For some reason during start up a mess of coak floats on top of the pool of oil, I used a metal rod to move it off of the burner and then no more problems. Also during start up or when ever the door is open, the flame vortexes up the air intake tube but, as soon as the door is shut draft changes from the intake to the flue. Then the fire spreads out to the sides again.
The soot level is pretty high but this was expected. Oh yea, wind plays havoc on the flame. This will change when I get it inside.


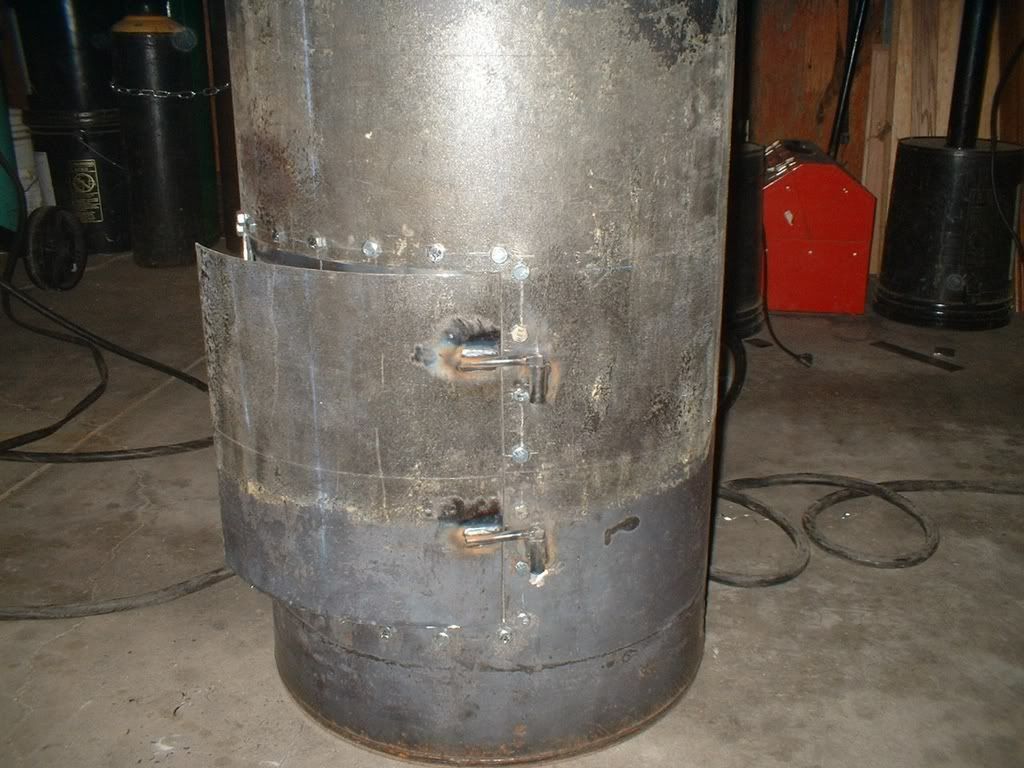
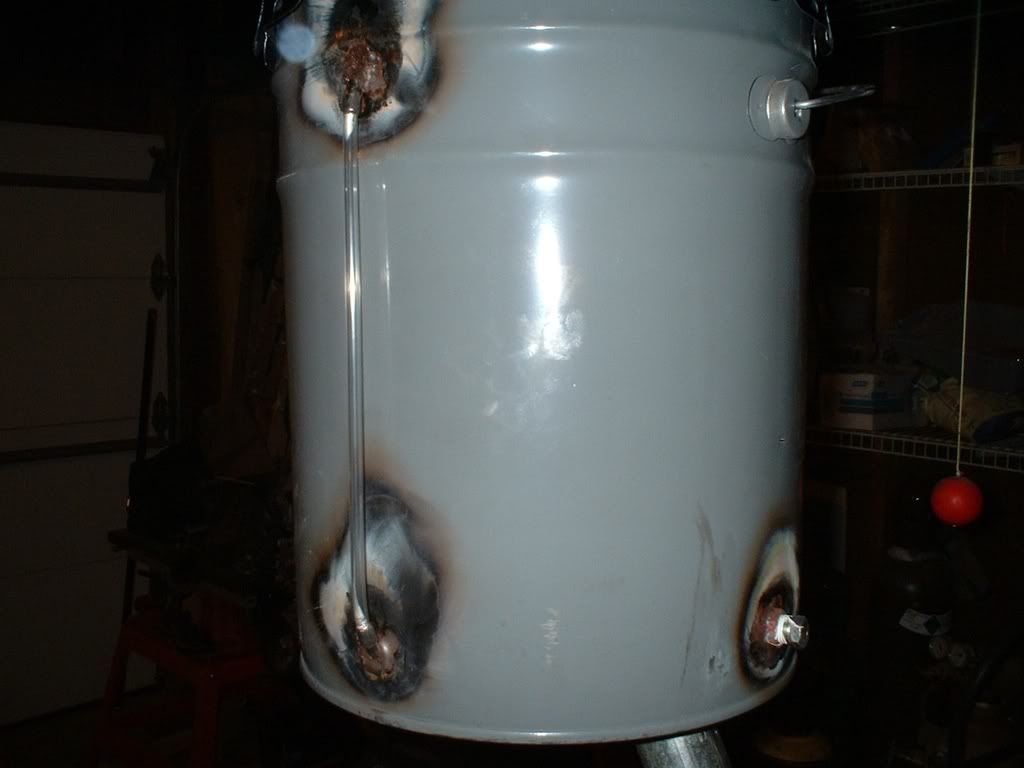
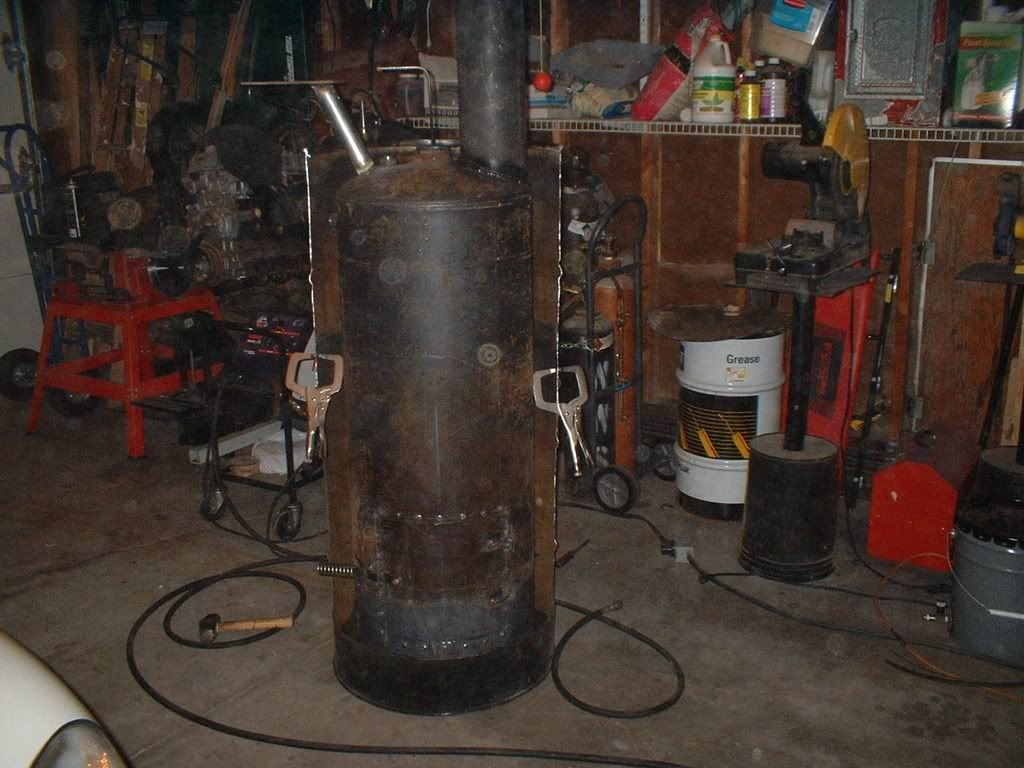
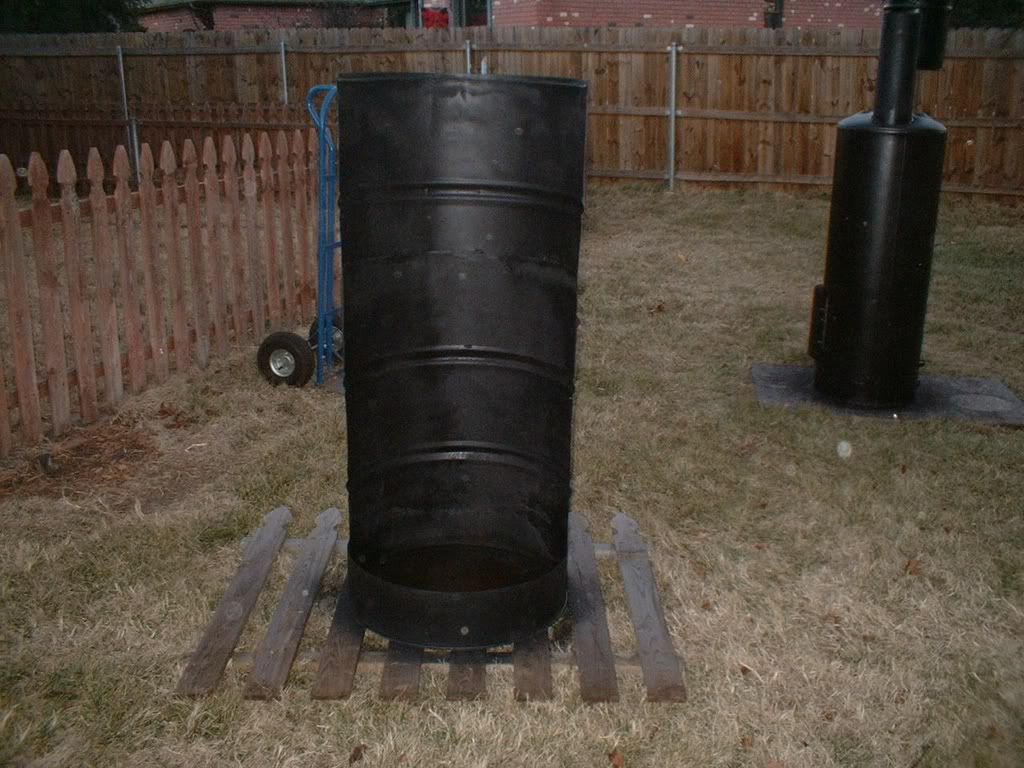
I brought home a barrel and cut it to make the shroud.


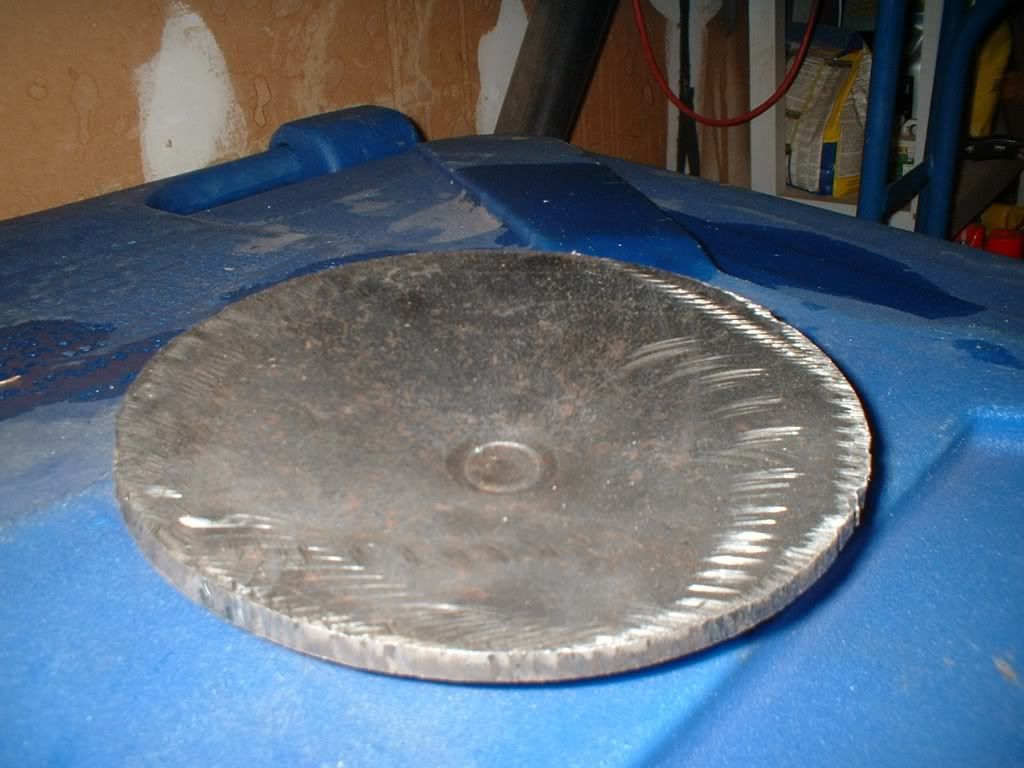
Here are the additional burner pieces. The lower pan has not been cleaned.


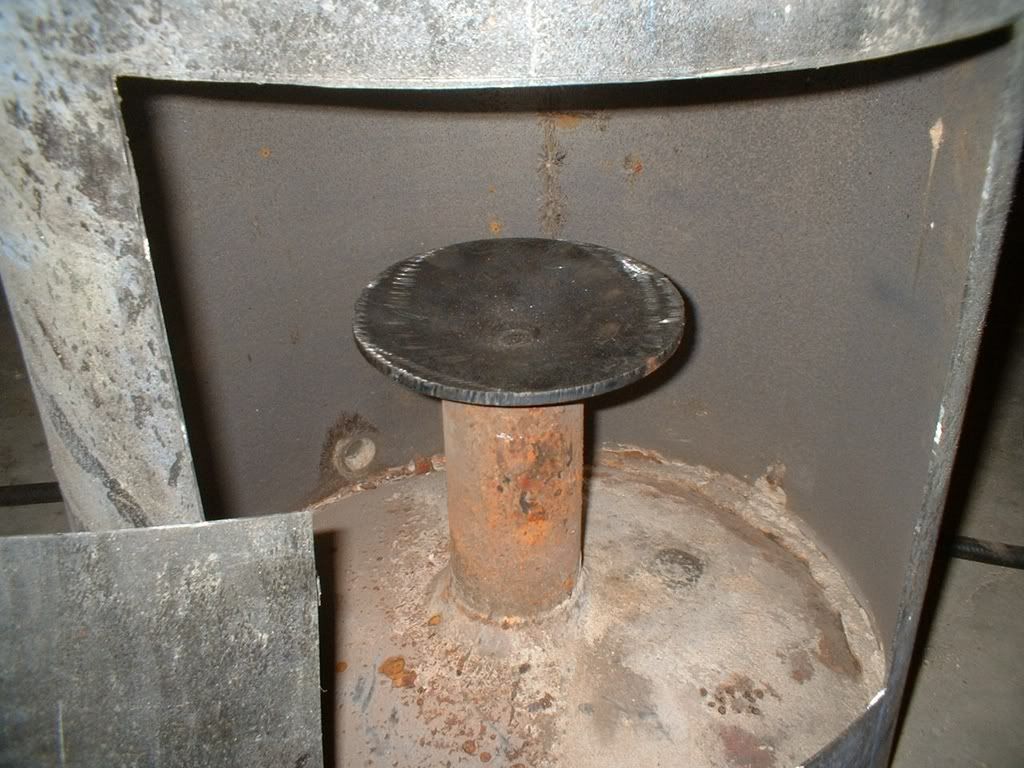
This is the complete burner.


It is painted and ready for installation. Now I have to find a chimney kit at a reasonable price. Installing it will cost the most.
I used Caterpillar muffler paint for the project. When it cures it will be a little lighter than charcoal grey.
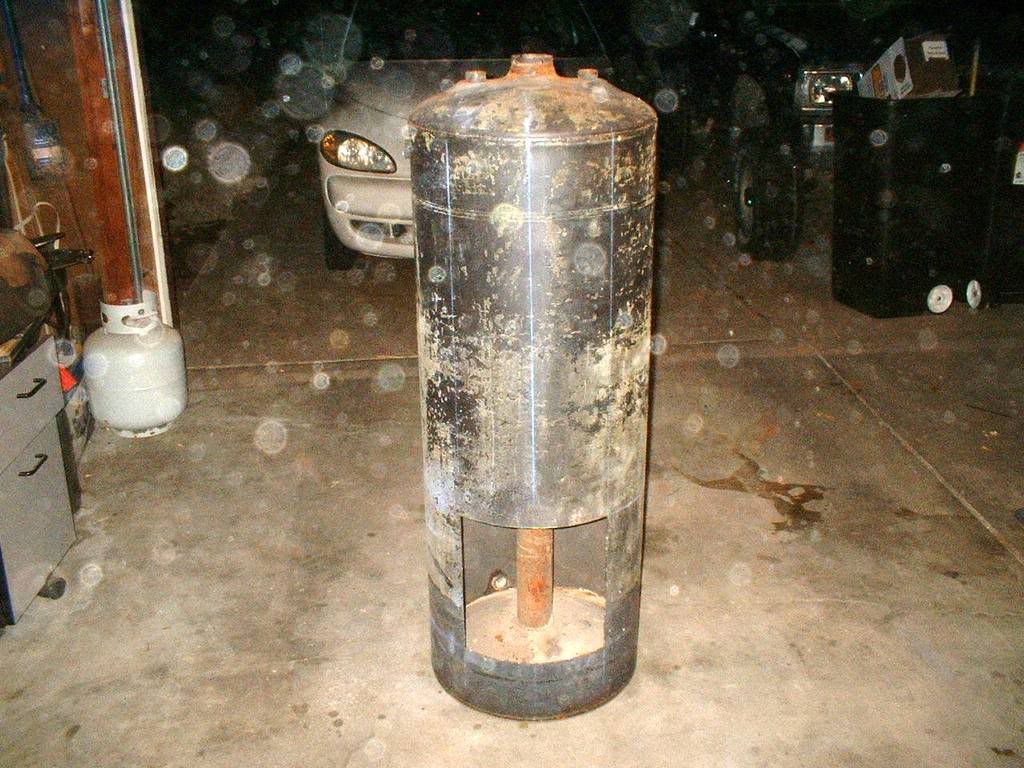
The heater.


The shroud.


1/24/09

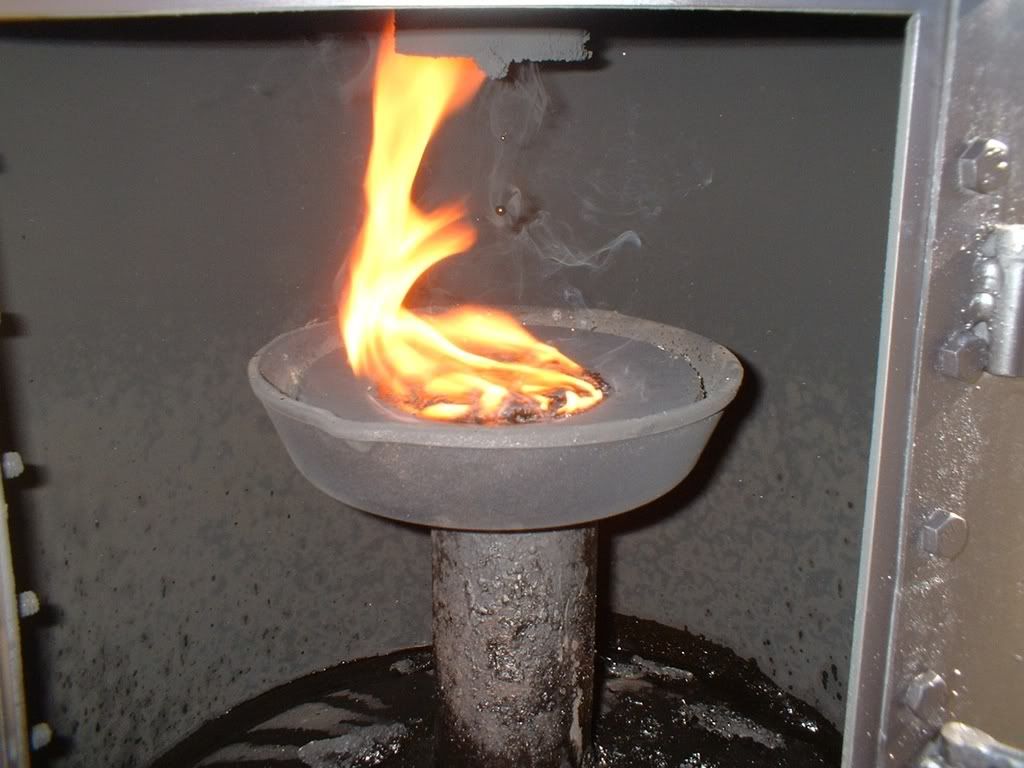
Well it is not as warm as it was last weekend, 21 degrees. I wanted to show pics of the flame and the iron burner in operation. It was difficult to get the oil flowing. I am using old motor oil from our personal vehicles. It is very thick when it is this cool. With less wind it was easier to light. Here are the pics at medium burn. It is the best I could do with the oil flow under that temp.


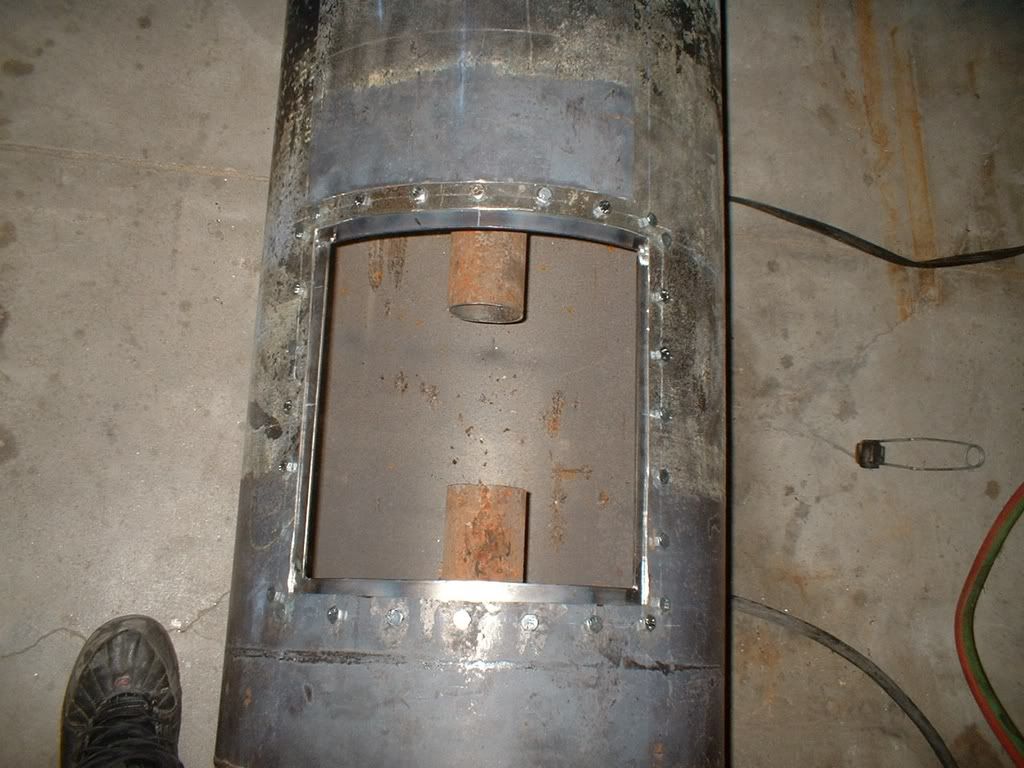
The next pics are looking down the air intake.


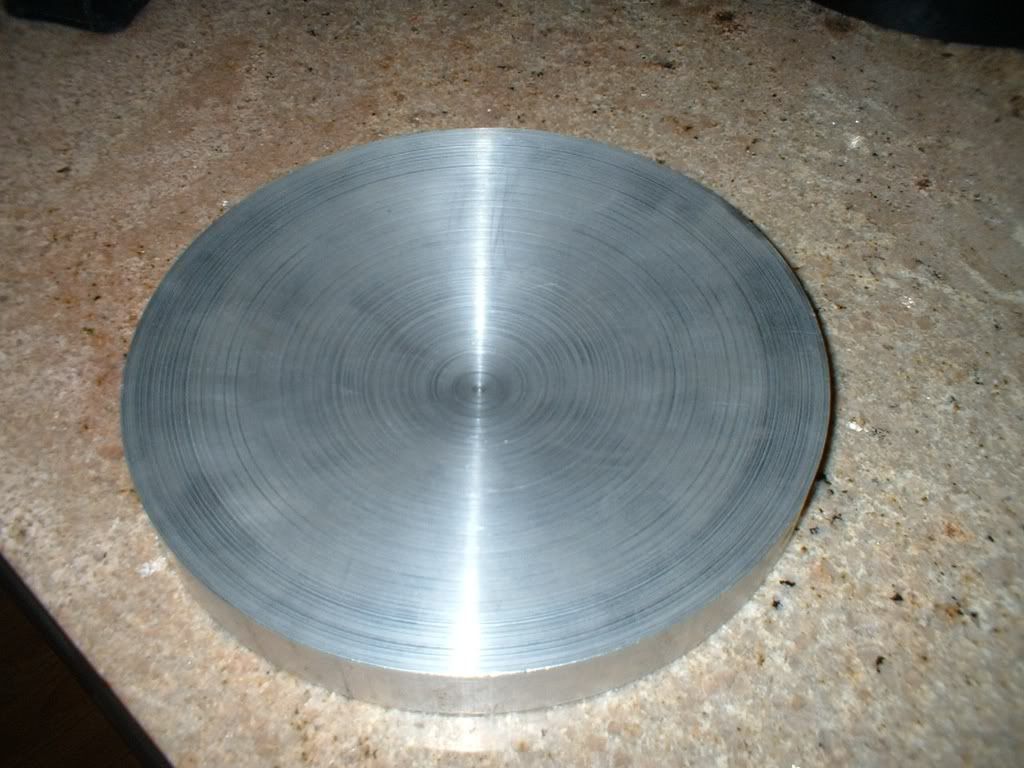
The new aluminum burner, I will test this tomorrow. The first 1 inch from the out side diameter is cut at 10 degrees. The rest to the center is at 12 degrees.


1/25/08

The aluminum disk is a total waste of time. The flame would die as soon as I shut the door. The cast iron and steel burner is what I will use from now on.
I started when it was 18 degrees outside. I also put the heater in the in the shroud. The shroud works outstanding. The heater is at 700 degrees and the out side of the shroud is at 50 degrees.
A dampener is a great addition to the system. It makes starting easier. I just shut it to a small opening and less air is pulled in to cool the oil. As the oil heats I open the dampener a bit more. To keep the heat at its full potential I have been running it about 1/2 open.
I have been running this thing outside and keeping the oil flowing it tough below 40 degrees. The oil bucket cools pretty quickly. I think in the shop this will not be much of a problem as there is no wind, and the shop will warm, and warm the oil also.
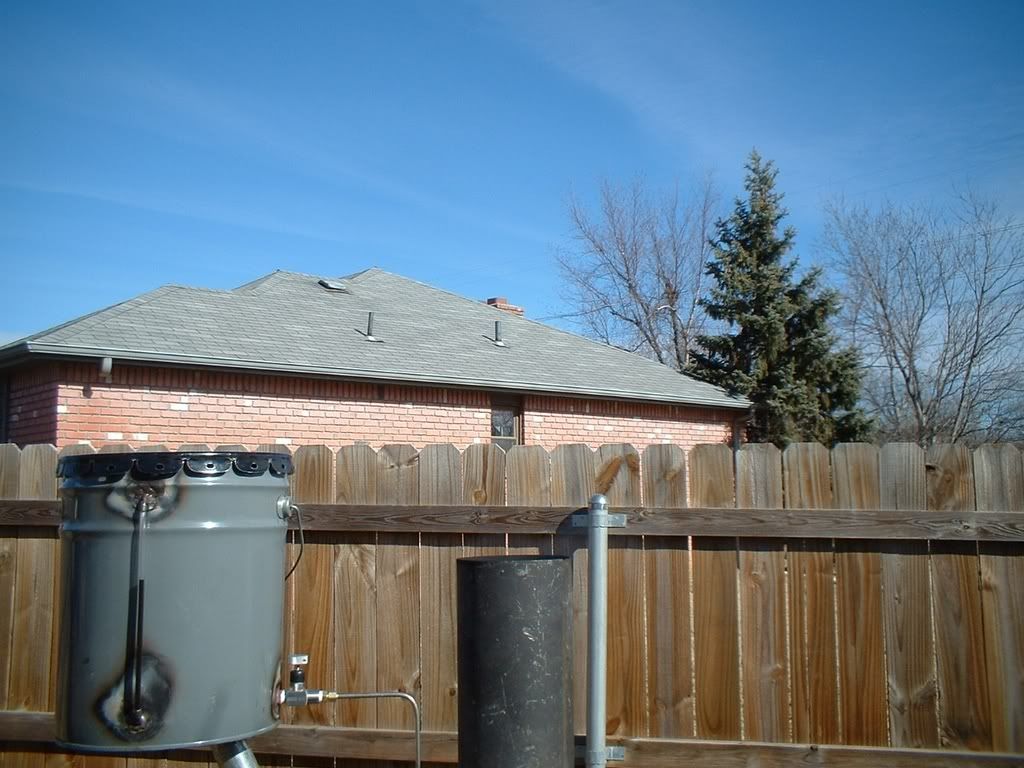
Yesterday I went out and picked up a 5 inch chimney system, my buddy is using a 4 inch exhaust, so I think I should be okay. I have a few more parts to pick up; I need to go to a heating and supply store to get them. They are a 7 inch roof flashing and storm collar.


20
User Projects & Pictures / Re: Roger Sanders Waste Oil Heater
« on: January 26, 2009, 02:39:33 pm »
I have drilled 28 holes and mounted the door frame. I measured each side of the frame and found the center, then marked them. I did the same on the outside of the door. I then clamped the frame into place. I spaced 5/8 outside the door and drilled the center marks. Then put bolts in and tightened them. I marked every two inches and drilled for a bolt.

After the frame was in and tight it was not quite the same shape as the door. To fix this I used a 3 lbs sledge to beat it into shape.

The heater with the door.


The door removed.


I installed the hinges and welded them to the door. They are made from the handles of a R-12 Freon tank. The tank is the white tank I am using as my oil tank. They also are made from 3/8 inch bolts with the heads lathed down and the 3406 engine push tubes, as mentioned before. I used a piece of 3/8 round stock to align the hinge tubes.
Here is the pic.


It started well the door latch was coming together great. The door pulls tight and locks smoothly.


I bought a metal 5 gallon bucket from Sherman Williams. I have soldered all of the fittings for the drip system and level indicator. I like this thing better as it lets me remove the top for cleaning. The only draw back is I have to make a frame for it to sit on. The metal is even thiner than the R-12 tank.
I had a piece of 1/4 inch plate that I have been sitting on and it fits inside the lower lip of the new oil tank. So I welded it to the galvanized tube and the tank sits very stable on the plate.

The oil tank close up. The fitting with the plug in it is for the oil drip line. The plug was there for leak testing.


The complete setup less the pluming.


21
User Projects & Pictures / My Roger Sanders Waste Oil Heater
« on: January 26, 2009, 02:23:39 pm »
1/7/09

I gave the MEN information to a couple of guys at work. We have an endless supply of used oil so why not make it happen. One of the guys has finished his unit. He did a 5 hour test run with a chimney sticking out the side door of his garage. It was 20 deg out and about 75 deg in the garage. His unit did not use the conical burner; he used a stamped metal pan. He also used a 4 inch computer fan to blow in the air tube. Over the five hours it used 2 gallons of oil. His tank is located above his heater off to the side. It is also attached to the heater. It also uses a simple needle valve for oil control. During the visit he never adjusted the oil flow.

I have started mine. I will be using a conical burner. I have pressed it from 1/4 steel. If it does not heat up enough during start up then I will go through the hassle and make one from aluminum. Tonight I stripped the hot water heater and cut a door in it. Then I noticed that I only have a 3 inch draft tube. Since Roger Sanders reduces his to 2 inch to slow velocity I will leave it alone. I will test it this way and if needed will still reduce it or weld in a 4 inch tube. I will also mount my tank similar to the unit my buddy made. I am hopping to have it finished by next week.

I hope no one thinks that I am hijacking this thread; I intend to show pics as I progress.

The burner.


The 40 gallon water heater tank with a door cut out.


1/8/09

I have not finished much; I picked up some hinge material (push tubes from a Cat 3406 engine). I am going to use a 30 lbs R134A tank for the tank that will be mounted above the heater. I have removed the handles and valve from the tank and silver soldered a 1/4 npt female fitting to the top of the tank. This will be the needle valve will mount. I also need to install the sight gauge and drill a 1 inch hole in the top for filling. Sorry I do not have any pics of this, the tank is at work and I am working at it on breaks.

I spent a little time on the heater. I cut the old draft line and mounted the burner. I also installed 1/4 inch npt plugs in five of the holes that were made by the hot water manufacture.

I am ready to start cutting and welding. The hole for the new 6 inch draft line still needs to be cut, the tank needs to be mounted and the door hinges need to be made and installed. I also need to install the frame on the inside of the heater door opening. I may weld this into place. Unfortunately I must do some garage cleaning to get to my mig and torches. I have been working on a few wood projects and need to move a bench and a few sheets of oak plywood. I will be working on this after work tomorrow.

Here are a couple of pics.


Pages: 1 [2]