Show Posts

This section allows you to view all posts made by this member. Note that you can only see posts made in areas you currently have access to.


Messages - dngspot

Pages: [1] 2
1
User Projects & Pictures / Re: Spikes Truck Drum Heater
« on: February 13, 2011, 12:18:40 pm »
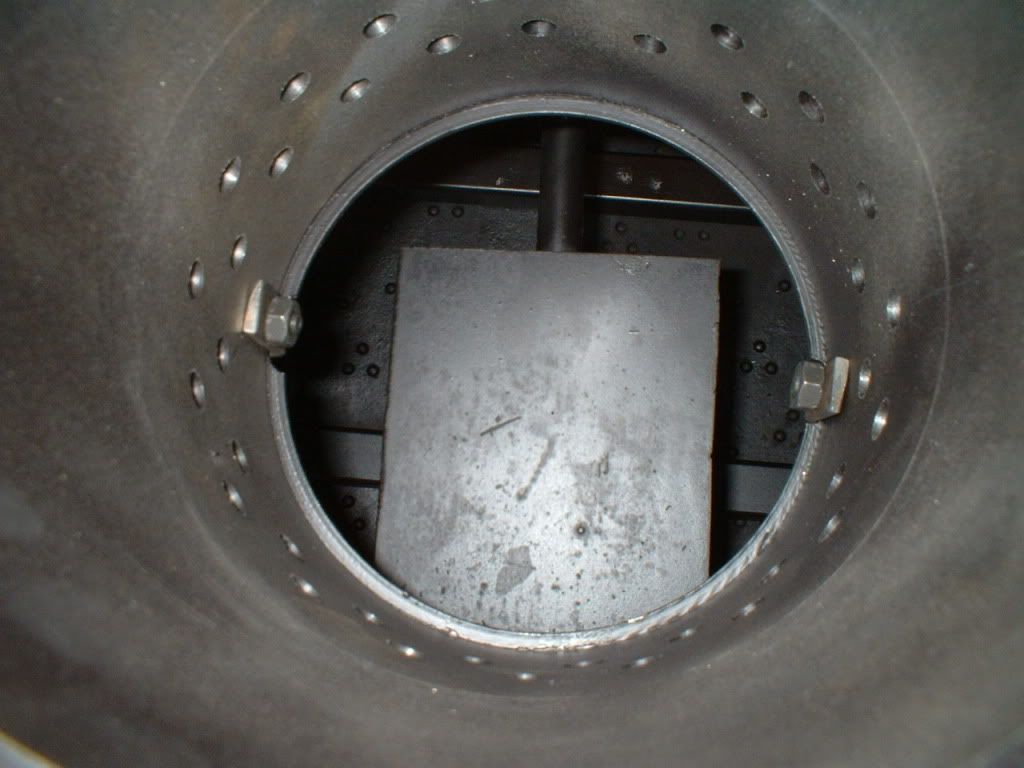
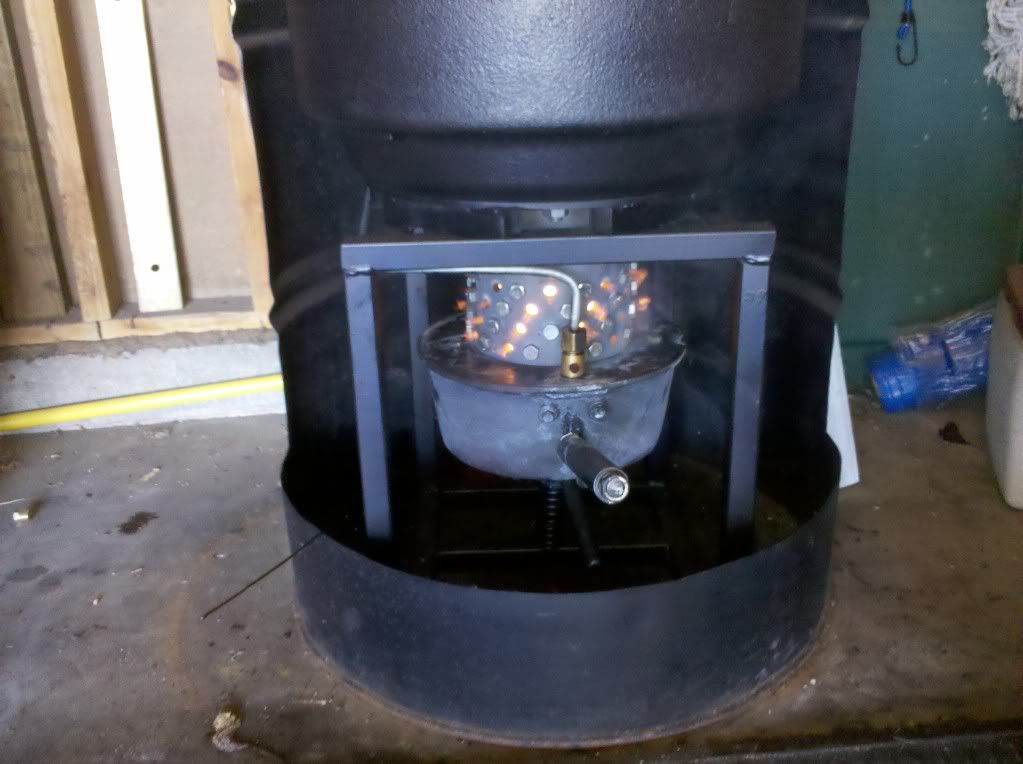
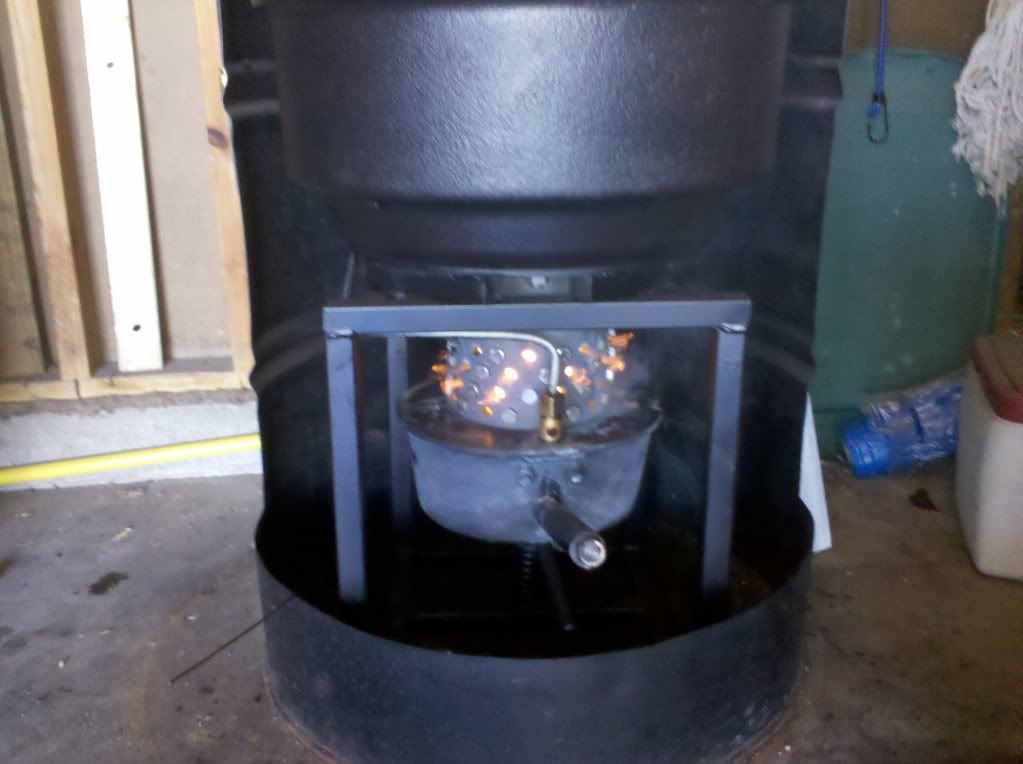
I plugged half of the holes, this is not the answer. The secondary burner threw out flames very quickly after start. The pot was under 400 deg. Now that I have all air leaks pretty much covered I wonder if the problem could be the diameter of the cylinder. I have access to three 4 inch cylinders but this would mean making changes to the lid and lower drum plate. I think I might contact the builder, Spike, and take his direction.
This time I managed to get a couple pics of the secondary burner when it is failing.


2
User Projects & Pictures / Re: Spikes Truck Drum Heater
« on: February 13, 2011, 09:36:35 am »
I have not done anything with my heater since early January. Now that we have had a break in the weather and out of the below 0 temps I did some more today.
I think I am getting closer to a workable heater. Today I took the pot, lid and cylinder to work to do some work. I made new brackets for the cylinder and lid. I noticed when I took them apart one of the brackets was holding the cylinder above the lid about 1/16 inch. I also obtained a large piece of sand paper that had an adhesive side and stuck it to a flat bench. I then took the pot and surfaced the top edge. That sucker is flat now. I took a light around the lid and pot from the inside, and could not see light from the out side of the pot. The biggest problem was actually my spring and hinge design. I noticed when I put the freshly surfaced pot into place I could pull the handle up and the front of the pot would lift about 1/16 inch before it would make contact to the lid. I placed a 1/2 inch spacer on the front of the hinge assembly under the pot and that did the trick. I will weld a proper spacer to the hinge later.
I lit the thing and brought it to temp. It made a couple of humming noises, this is what it did before it would throw flames out the secondary burner, and there were no flames this time. This may be because of the larger holes I made in the lid for the pot air intake. I will eliminate 2 of the holes until I have the time to weld them and re-drill to ¼ inch.
The hottest I could get the thing was 380 degrees at the top plate near the flue. The drums reached 300 and the pot was hanging around 800. All temps were taken at the top burn with a 1/4 inch pool of oil in the pot.
It was tough to light and this may be due to the amount of holes in the secondary burner, as per Spike. I plan on buying bolts to fill the 50% of the holes.
The exhaust was very clear, all I could see was heat waves, no smoke during all burn levels.
Over all I think things are moving in the right direction.

3
User Projects & Pictures / Re: Spikes Truck Drum Heater
« on: January 11, 2011, 02:09:29 pm »
Feel free to give those tips.
I have drilled two more rows of holes. With the same problem. I think it is because of air leaks between the pot and the lid. I have a bettere quality pot that I will be using. More work this weekend.

4
User Projects & Pictures / Re: Spikes Truck Drum Heater
« on: January 01, 2011, 07:47:52 am »
Yesterday I installed a 6 inch chimney. The thing continues to flame through the holes at high burn. I did open the pot during a low burn and noticed the flame would increase when this was done. This leads me to believe there is not enough air making it to the flame. One thing I will note, the chimney did give it a wider burning area before the flames come out of the holes in the cylinder. My next move is to drill more holes in the cylinder.
I also built a shelf for the bucket and plumbed in the oil line.


5
User Projects & Pictures / Re: Spikes Truck Drum Heater
« on: December 31, 2010, 07:31:34 am »
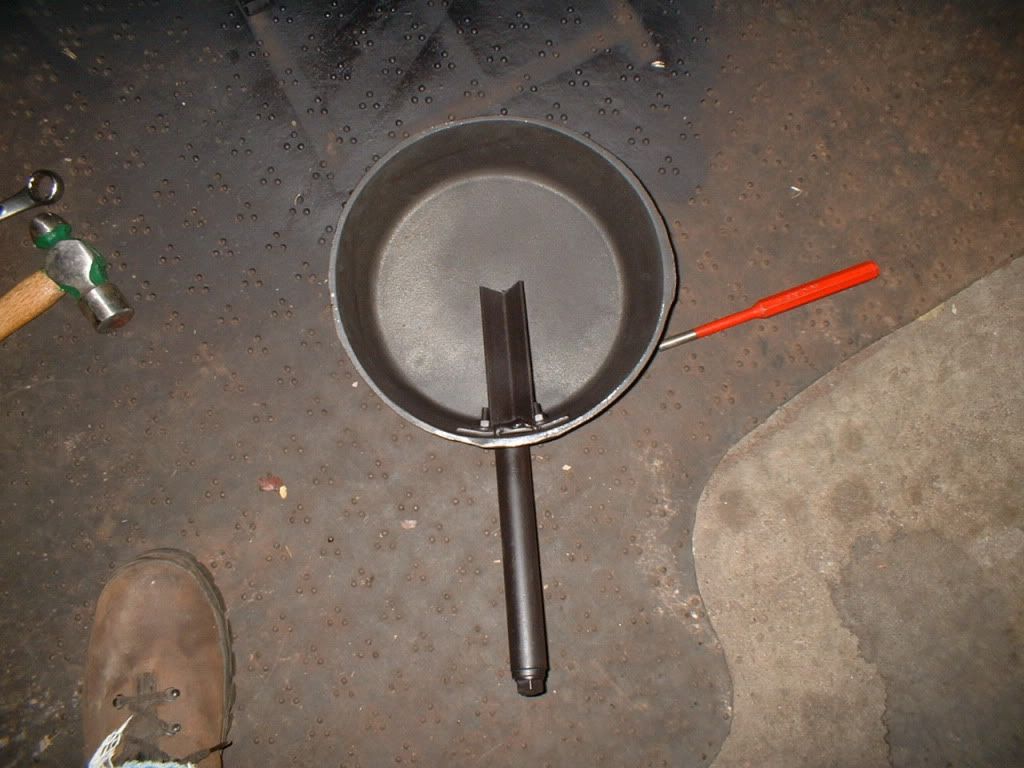
I did more. I welded a plate to a piece of angle iron, and then drilled 1/4" holes in the pot to bolt the angle iron assembly to. I also drilled a 1/2" hole, for all thread, to use as a handle. Then a piece of 1" pipe over the handle and a nut to keep the handle tight.


The cylinder was drilled with 38- 5/16" holes and two tabs were added. The tabs fasten to the pot lid, so when the pot is removed I do not have to fiddle with the lid.


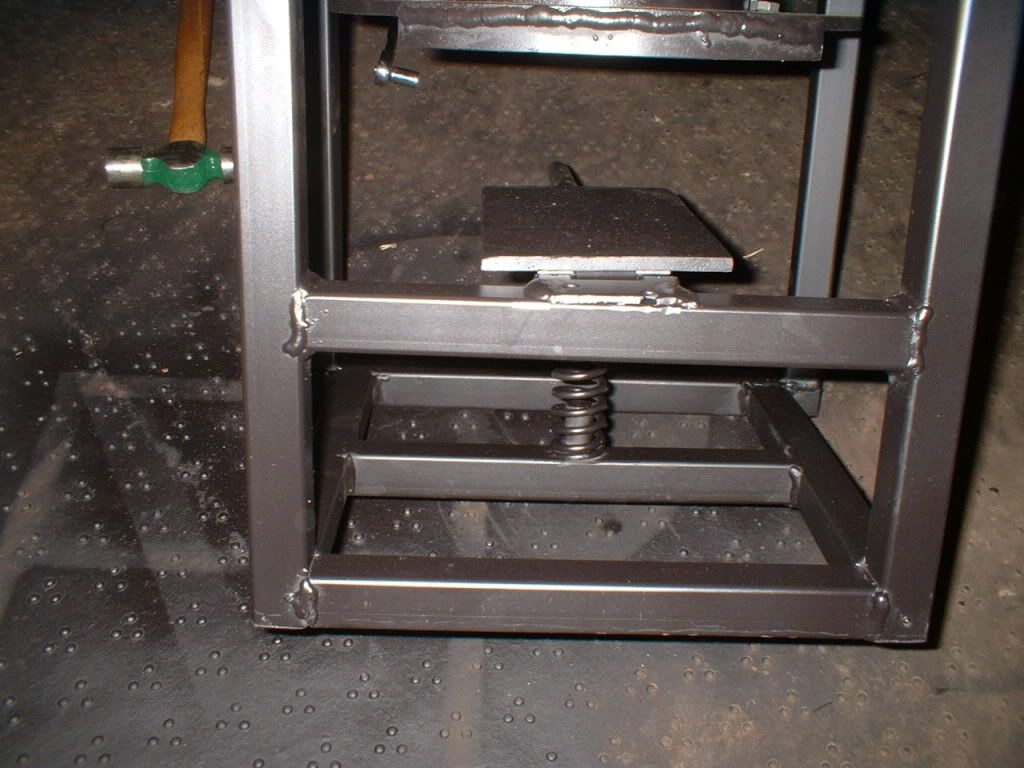
I did not post a pic of the plate the pot sits on. Again it has a spring attached to under it and uses a standard hinge.


The lid for the pot was drilled and taped to 1/2" pipe. I made tube connector from a 1/2" pipe nipple and cap. The nipple and cap were drilled a 3/8 bit.


I built a baffle from a piece of scrap. It hangs from the top about center of the drum assembly. The baffle is about 12" wide


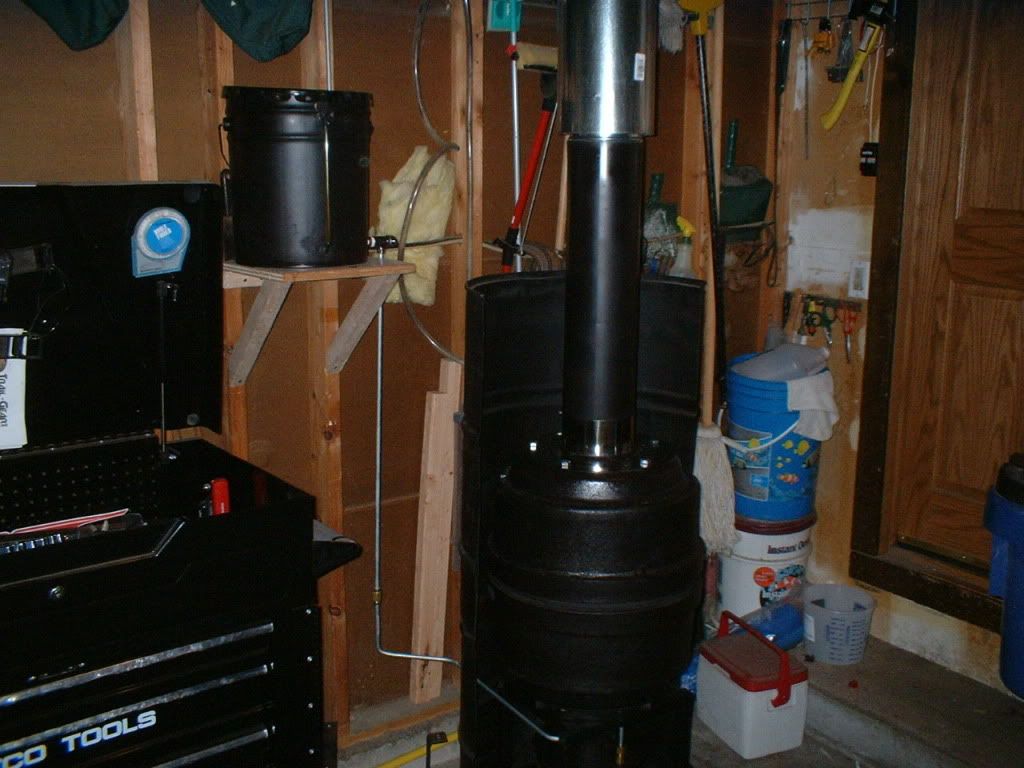
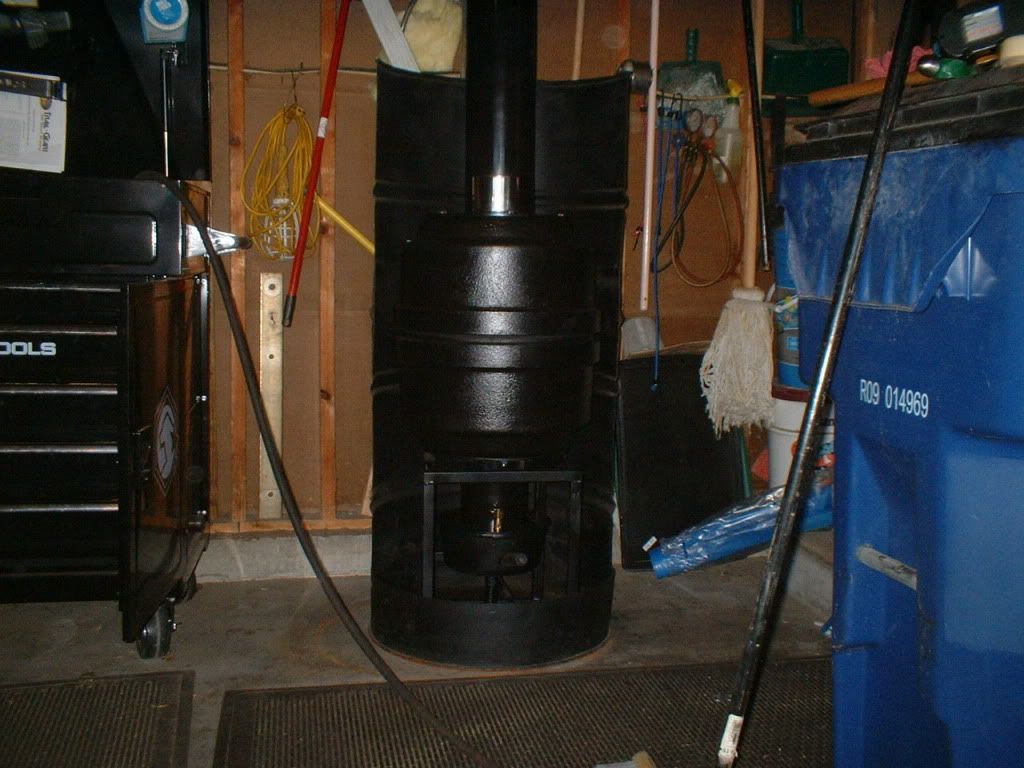
I painted and placed it in the old heater heat shield.


I did a test run with about a quart of oil in the pot. The heater smoked out of the pot lid 1/4 inch holes and when the oil came to temp flames came from the cylinder holes. There are about three things that I can change to fix the problem. The first would be a problem with the baffle. It was a design that I thought up not one that Spike uses. The second would be, my chimney reduces to 5 inches. I may have to put in 6 inch pipe. The third would only affect the smoke, I have too much vent in the pot lid, air could be coming in from between the lid and pot. I could install temporary bolts in the vent holes and see if the lower pot continues to get enough air but does not smoke.

6
User Projects & Pictures / Re: Spikes Truck Drum Heater
« on: December 28, 2010, 11:34:54 am »
This morning I went out to a very cold garage and cut off the front of the stand. I built the front of the stand 2" wider than before. In the pic I put most of the heater together for a quick view of what the dimensions are going to be. To the right and about 15 feet behind is the Roger Sanders heater I built a couple of years ago. I ran it up to 500 degrees and could still see my breath after 2 hours. Nothing is fastened together in the pic.
The remainder to finish the project.
1. Build and fasten a couple of brackets to hold the pot lid to the cylinder.
2. Drill into the pot lid and build or assemble a connector for the oil line. I will use 3/8" copper or steel line.
3. Drill the vent holes in the cylinder.
4. Drill the pot to accept all thread for a handle.
5. Install a piece of angle iron in the pot to direct the oil to the center.
7. Test out side
8. Clean and paint then install.


7
User Projects & Pictures / Re: Spikes Truck Drum Heater
« on: December 27, 2010, 03:32:19 pm »
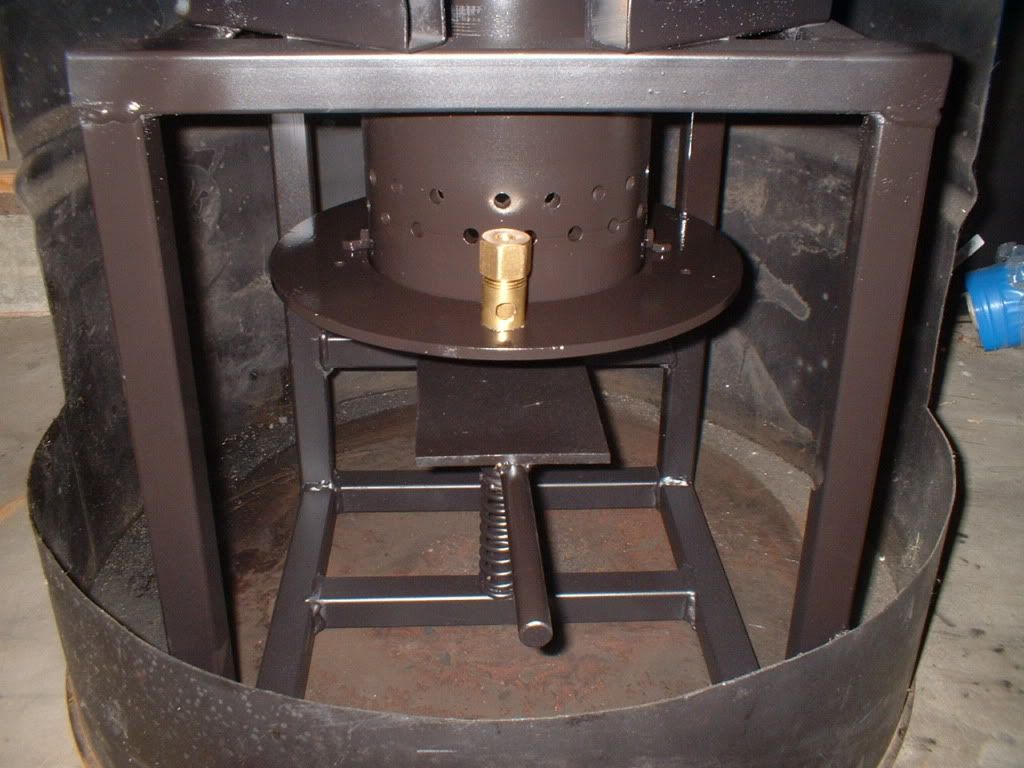
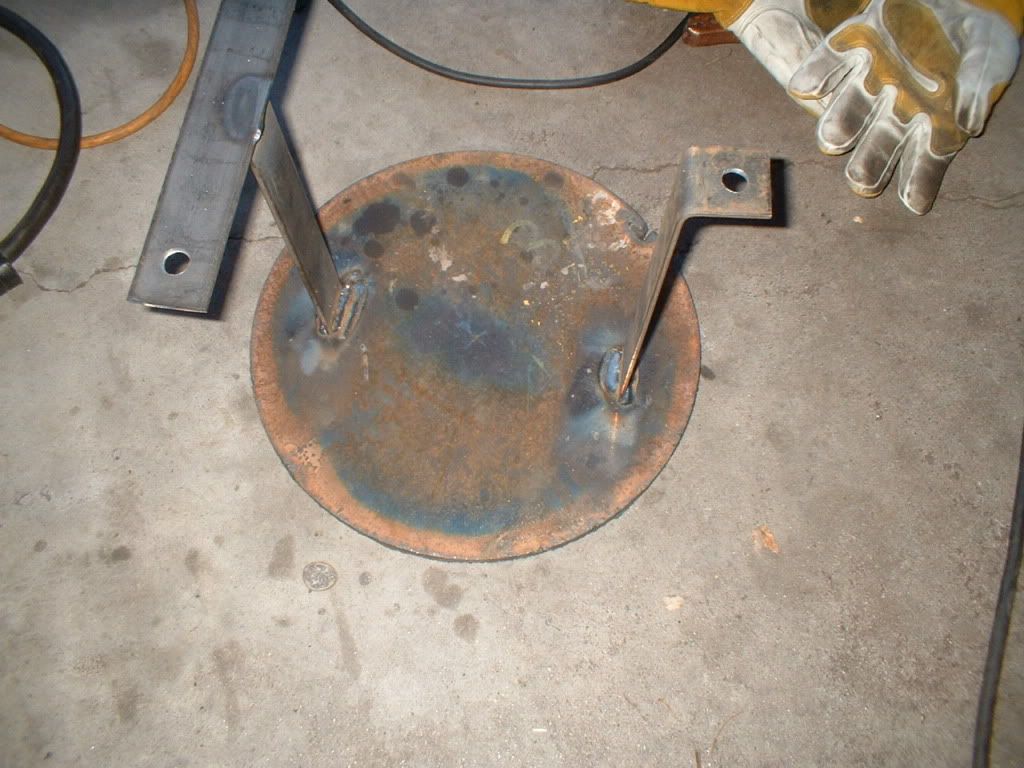
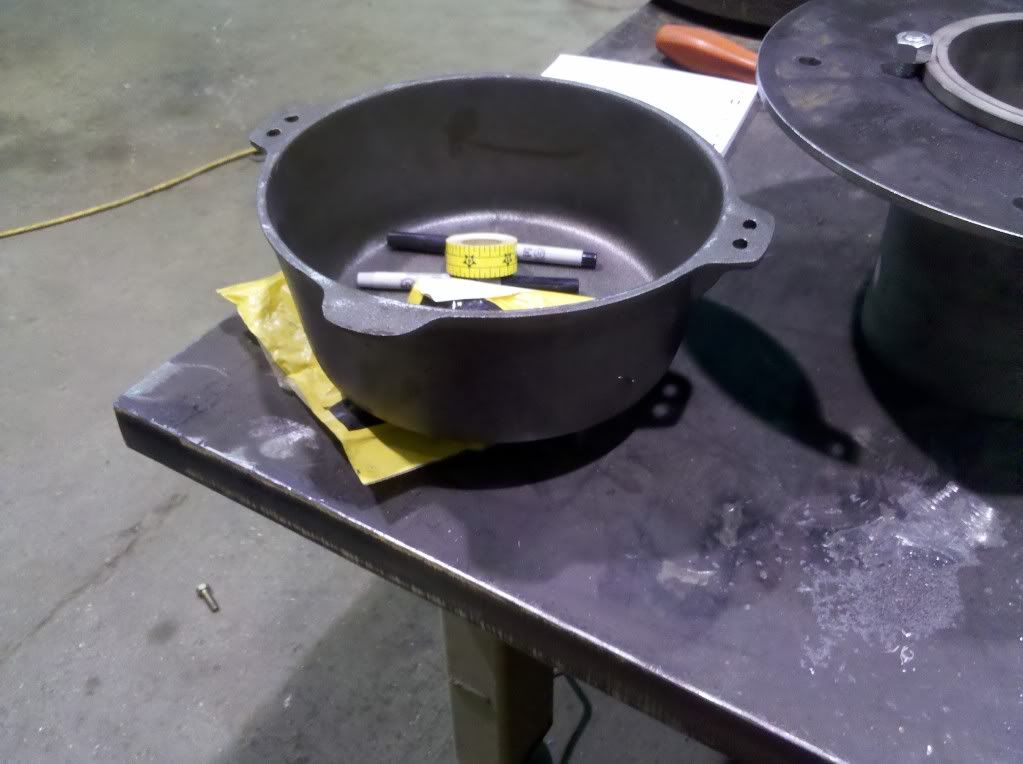
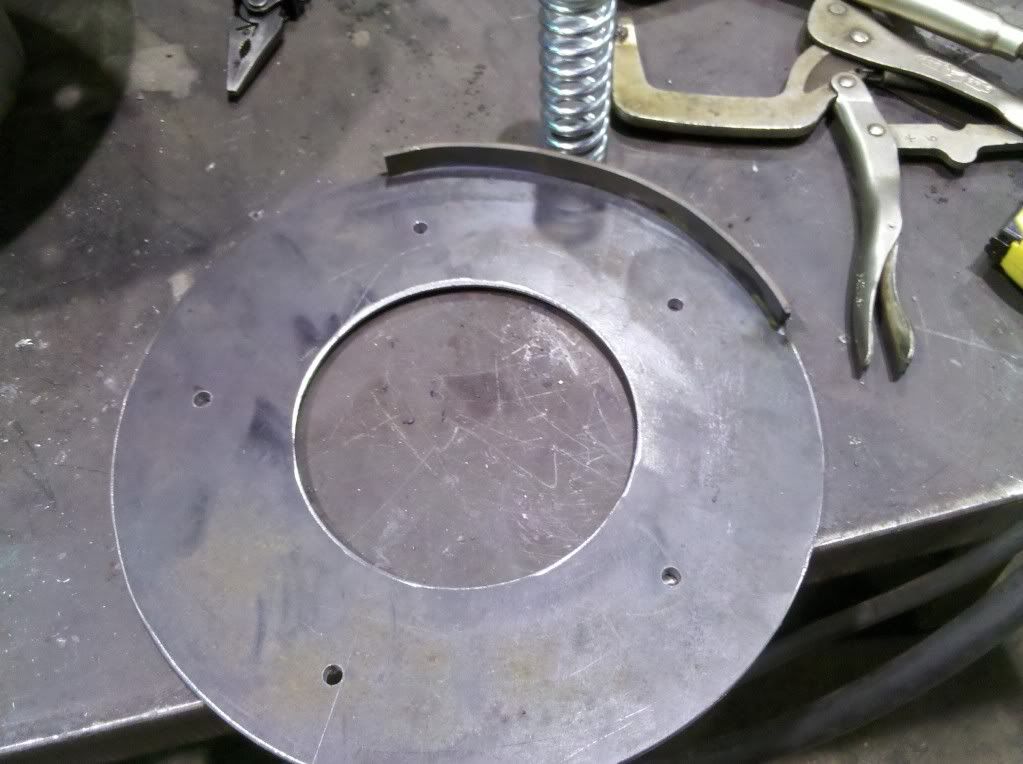
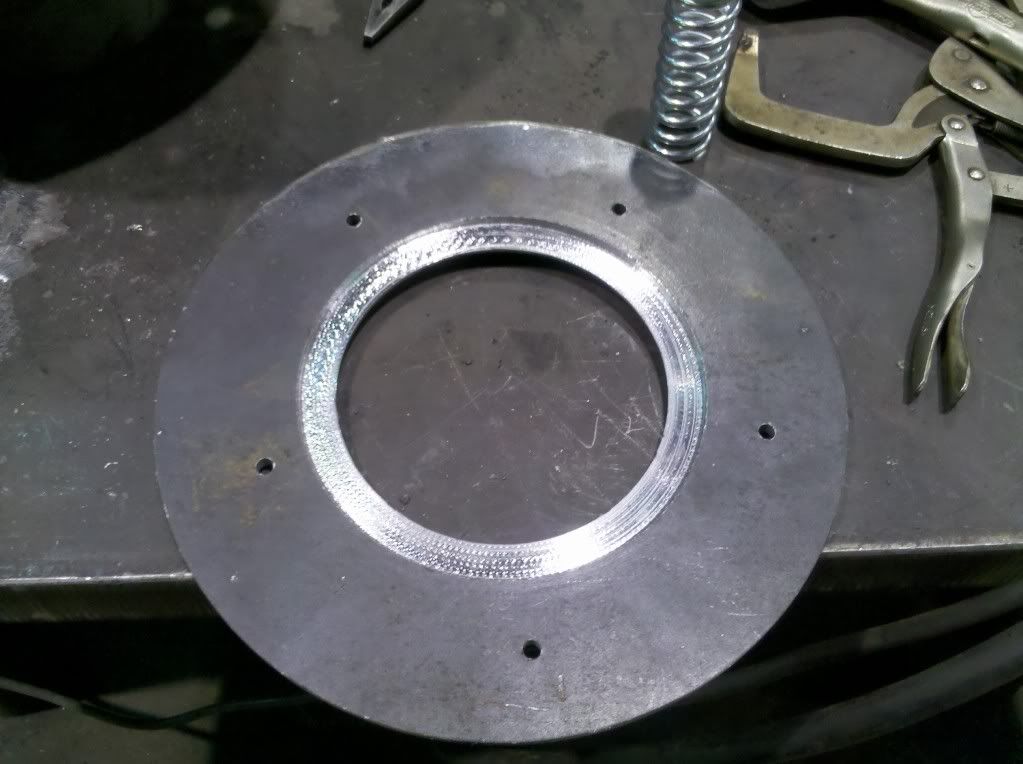
I cut another disk. It will set on top of the cast pot. The pot is the place the oil will drip into. The disk is machined so the cylinder will fit into it. The cylinder is about 6" O.D. The disk also has 5- 1/4" vent holes and a piece of steel welded to it, to help position the pot.

Here is the pot.


The bottom of the disk…


... and the top of the disk.


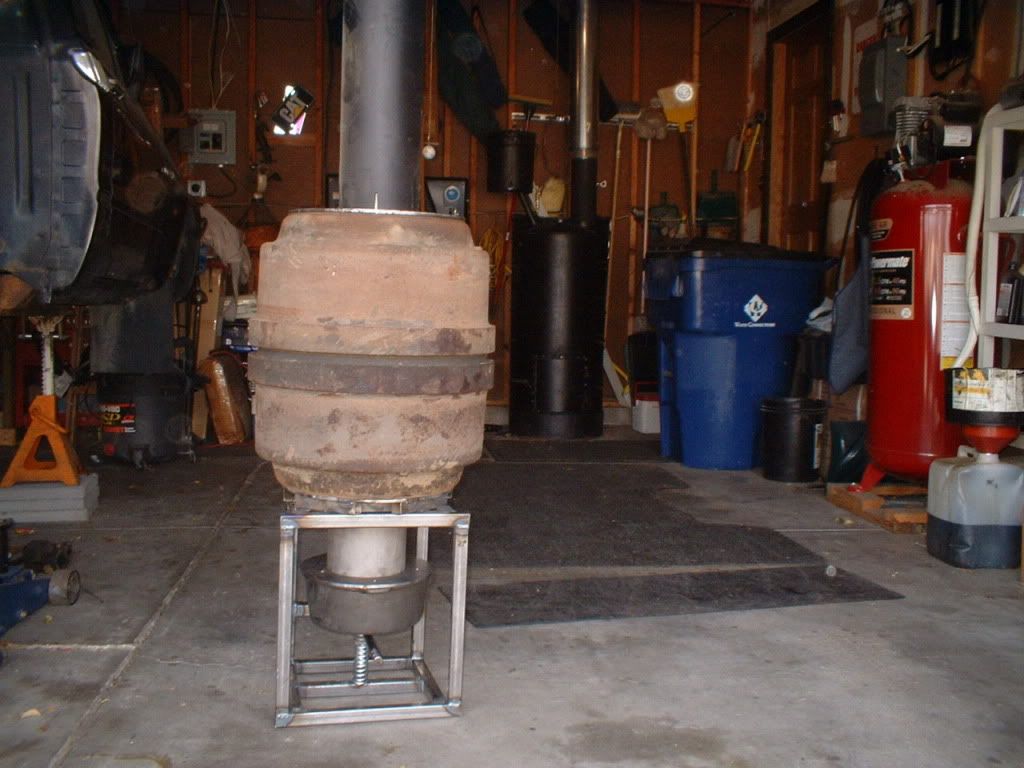
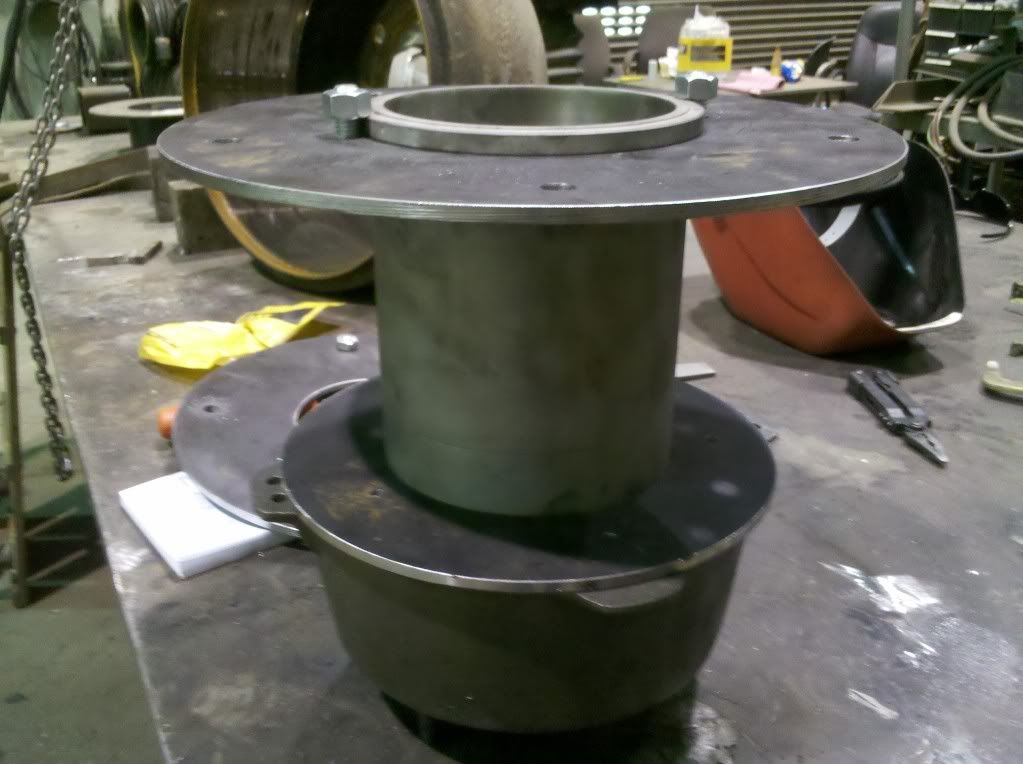
This is a pic of the burner assembly less the frame. The top plate will be bolted to the lower brake drum.


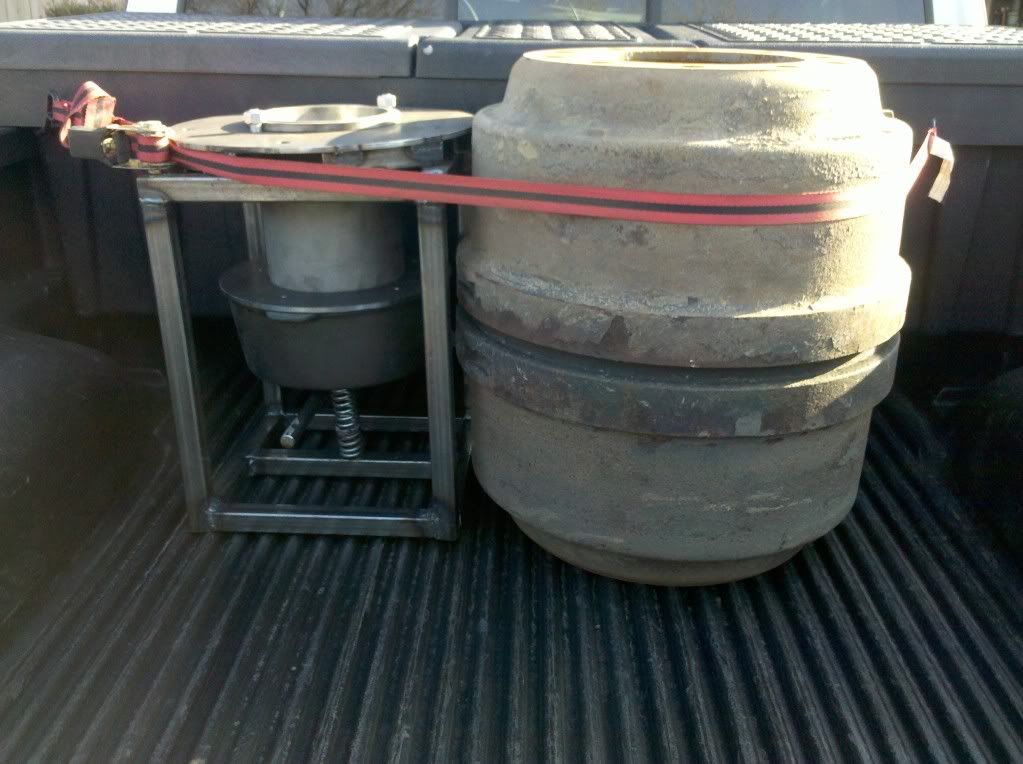
The frame has a spring and a handle to release the pot. The spring pushes directly on the bottom of a plate that the pot sets on. The plate is attached to a hinge that is welded to a cross member on the back of the frame. There are two dowels one for the bottom of the spring and one for the plate to keep it in place. The plate for the bottom drum has 1 inch spacers for bolt clearance, welded to the frame. The drums setting next to the frame are setting as they will once the frame and drums are mated.


I need to widen the front of the frame; it is difficult to clear the pot. I also need to drill the cylinder for vent holes and install a baffle in the drums to deflect the draft out to the drums. Then I can weld on the draft tube, paint and install.


8
User Projects & Pictures / Spikes Truck Drum Heater
« on: December 27, 2010, 03:02:45 pm »
I have been able to get 800 deg from my Roger Sanders heater and want it a bit warmer. So I am giving it a go with a different design. It has cast iron drums and a better air intake than the Roger Sanders design, in my mind.

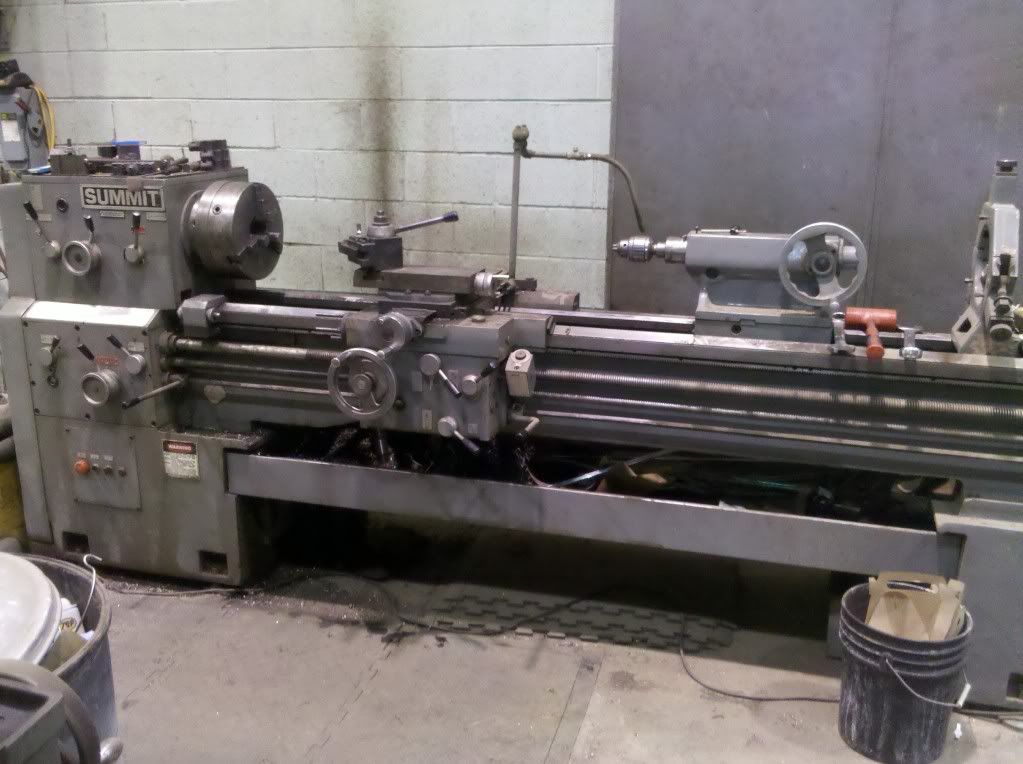
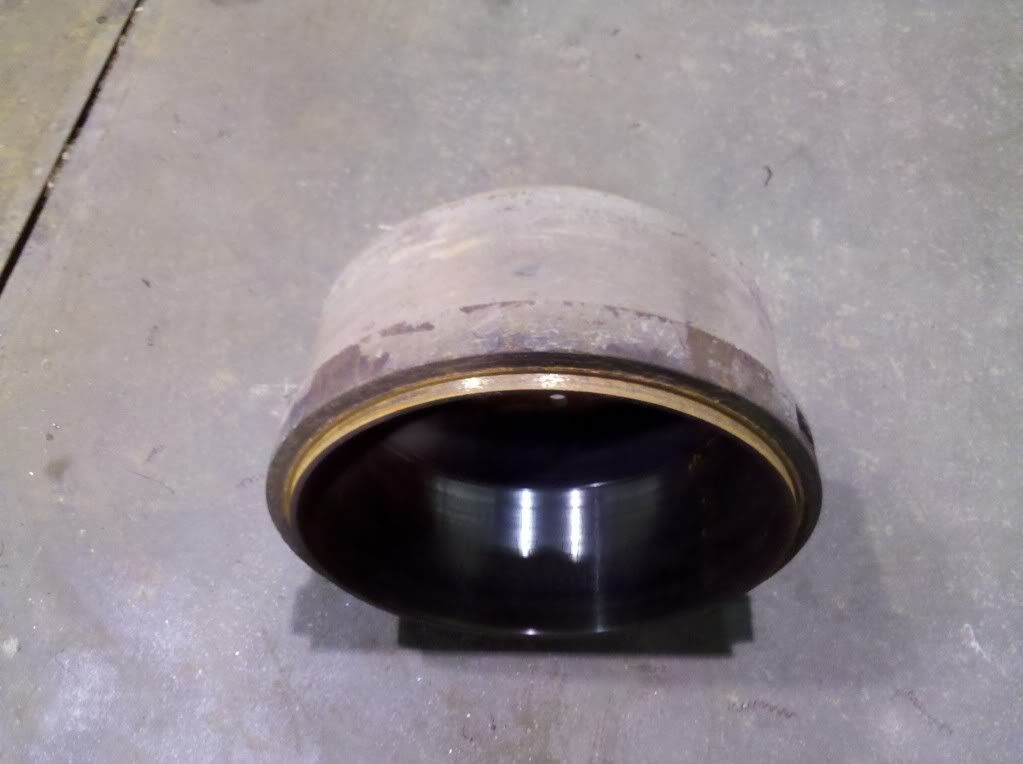
The first thing I did was obtain a couple of 16.5" brake drums from a large semi type truck. I put them on the lathe at work and machined the drums so the open edge of the drums would mate with each other.

Here is a pic of the lathe I used; it took about 2 hours to do both drums. It is also available to me during off hours at work.


The drum edges, they are orange looking because of the fresh rust. I kept these in the back of my truck for a week while I gathered parts.

The outside cut on the bottom drum.


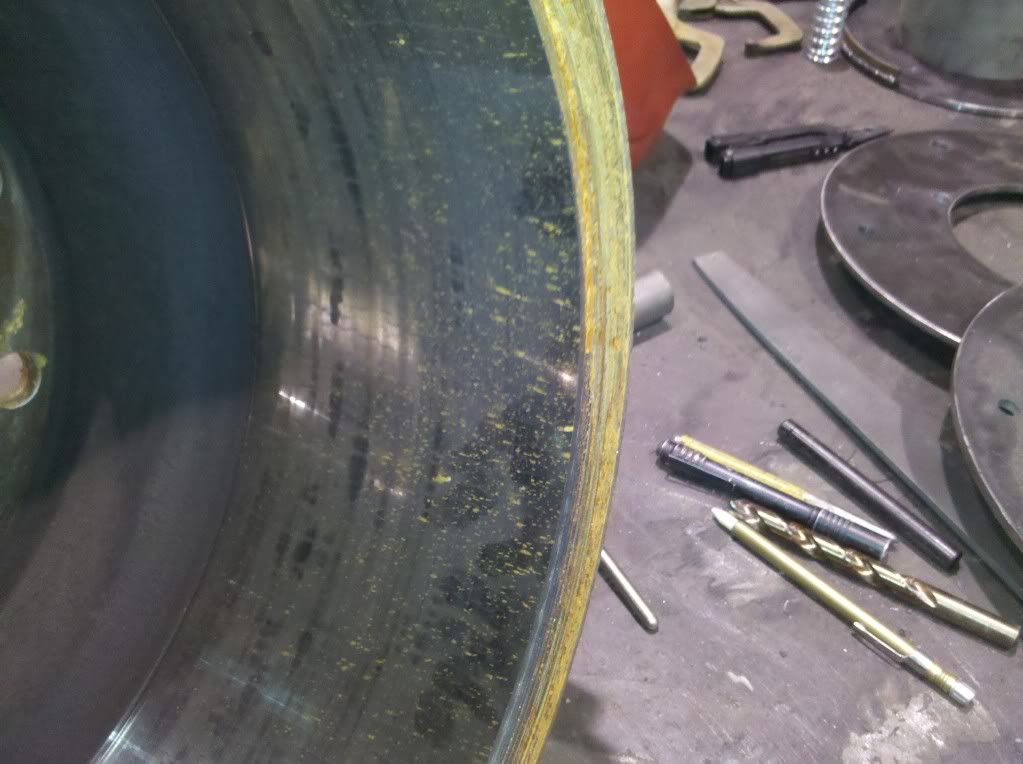
A close up of the inside cut on the top drum. Sorry for the pic quality.


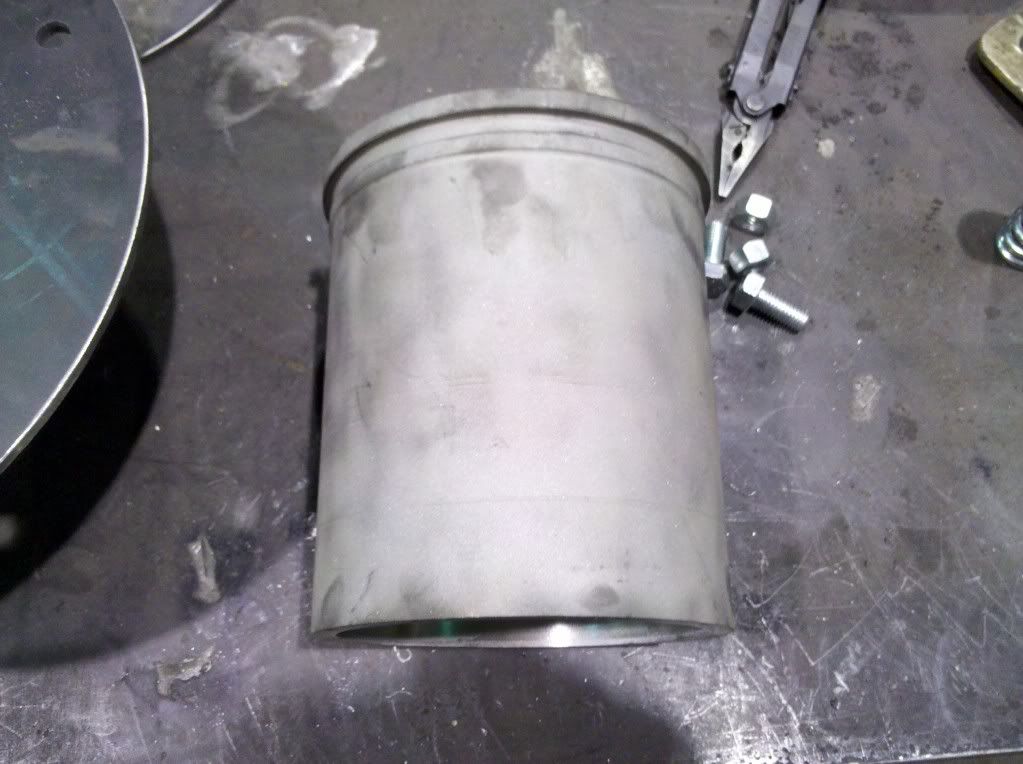
The cylinder after sandblasting and removing the bottom 2 inches, I believe it came from a C-15 Cat engine. I cut the bottom flat and inside of the cylinder with the lathe. I cut the inside of the cylinder about .020" because that area seems as hard as diamonds and does not drill well. The air vent holes will be in the lower 3" of the cylinder.


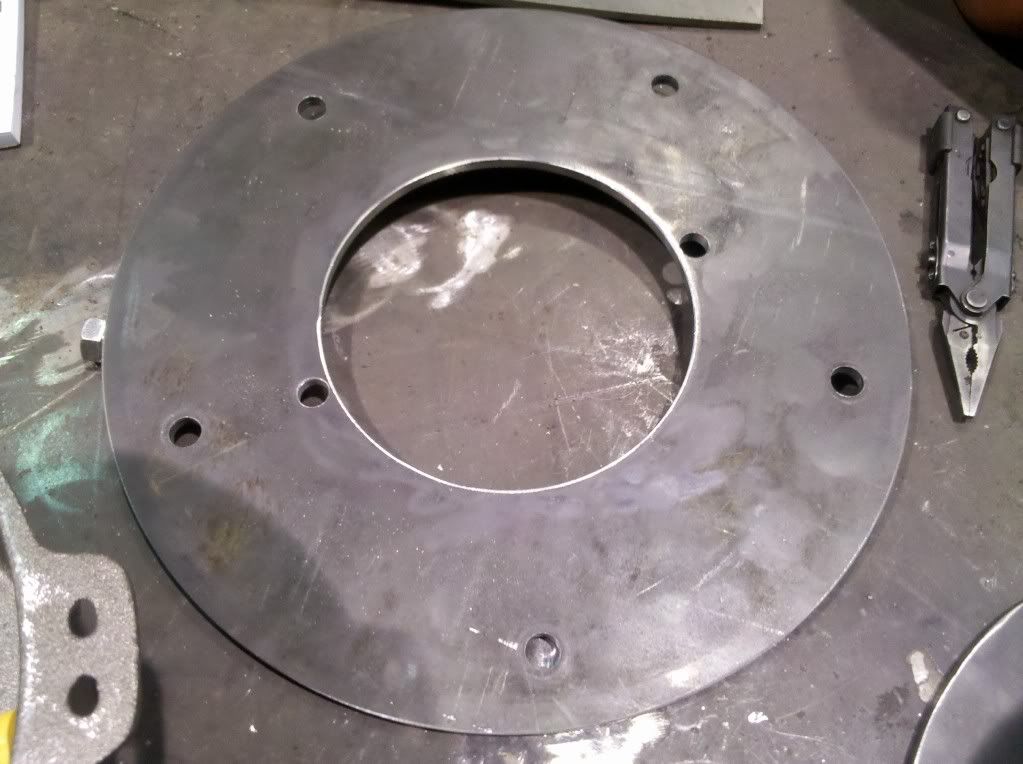
I cut 2 round plates to fit on the lug side of the brake drums. Both plates have 5- 1/2" holes for bolting. There are more holes, two for the bottom plate to fasten the cylinder to.


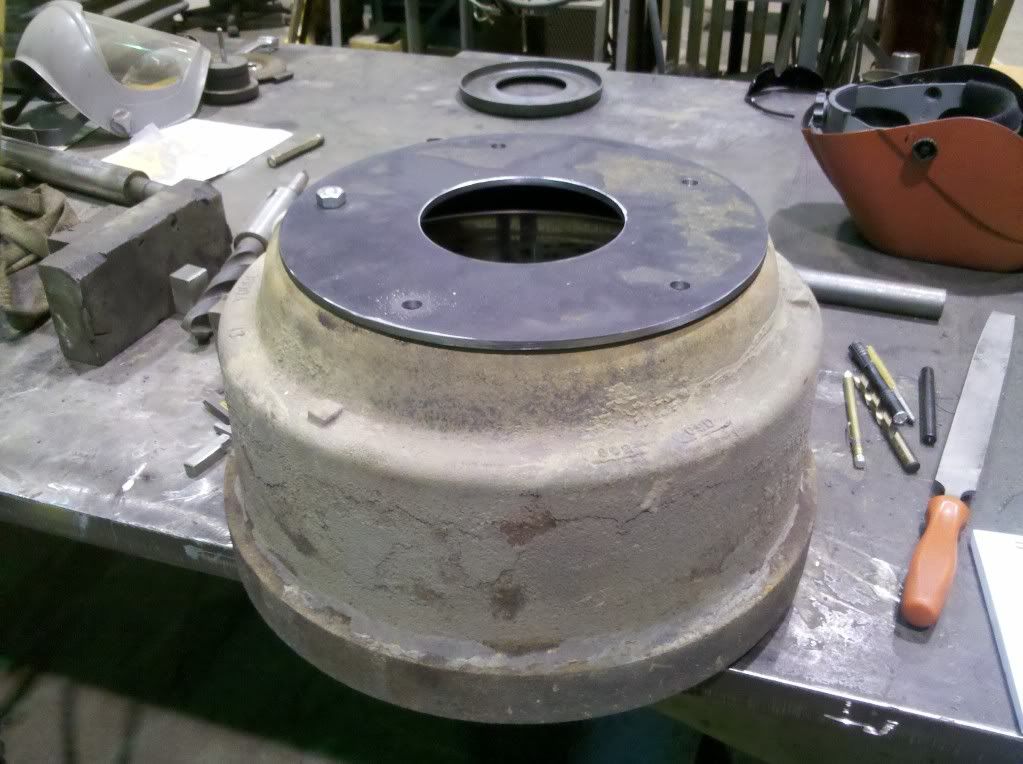
This pic shows the top drum with the second plate on top.


I will post more as I go.

9
User Projects & Pictures / Re: My Roger Sanders Waste Oil Heater
« on: December 27, 2010, 02:37:19 pm »
Roger Sanders is no longer posting the plans. He is now charging a fee for them. If you follow my directions you should be able to build it. If you have any questions feel free to ask.

10
User Projects & Pictures / Re: My Roger Sanders Waste Oil Heater
« on: November 24, 2010, 05:07:43 pm »
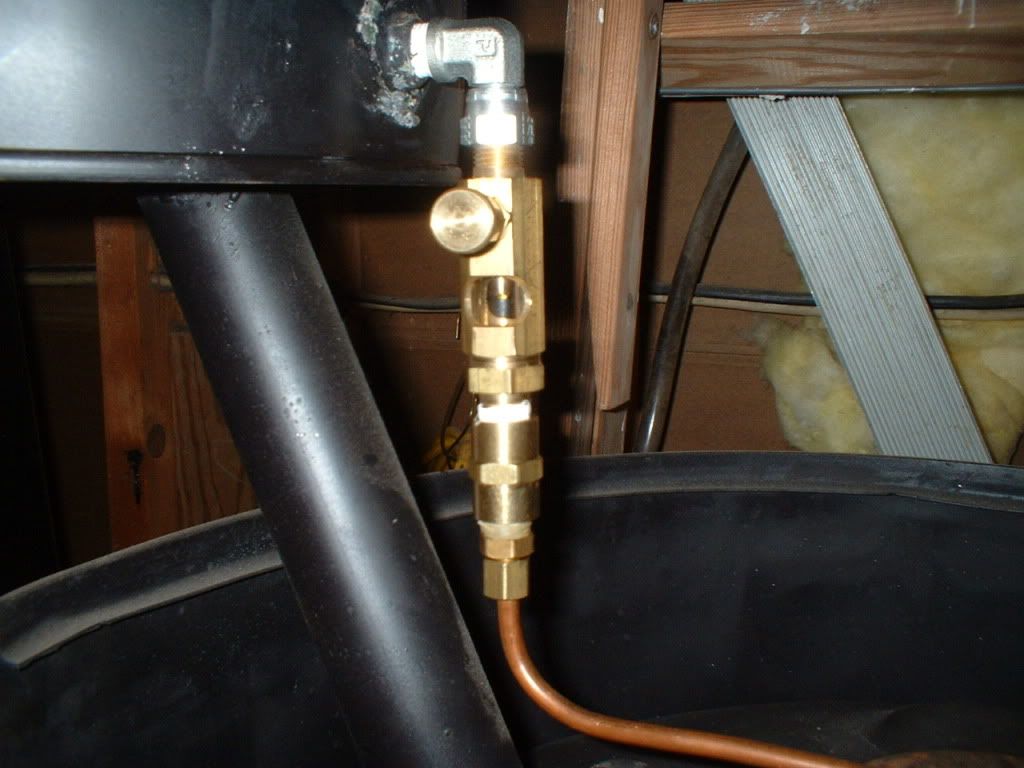
One thing I hated to do was to stand over the heater and look down the intake pipe to find out how fast the oil was flowing. During a search on waste oil heaters I found on YouTube a guy who built a Sanders design, he bought a needle valve with a window from Roger Sanders. He also posted he paid $50.00 for it. With a pic of the valve I began another search and found a valve made by Lube Devices and the part number was N102-02, It turns out that Grainger carries them under their number 1U795, they go for $34.95. This little guy makes setting the heater so much easier. I recommend highly.


11
User Projects & Pictures / Re: My Roger Sanders Waste Oil Heater
« on: November 24, 2010, 12:27:16 pm »
My version is not the original Mothers design; it is based on Roger Sanders heater.

The exhaust is not the pipe from just above the flame. It is a 6 inch pipe flush with the top of the tank to the side of the intake. The intake is located at the center of the tank and is just 8 inches above the burner. Air is pulled in from the 4 inch center pipe and pushes the flame out to the outer wall.

The vent is the flue and it exits through the ceiling and roof to about 1 foot over the ridge line.

The cast iron skillet is used to catch and burn any oil that might over flow the conical burner. I do not have this problem anymore but like the security. I tried to use the aluminum burner and like the steel one better.

I start the burner with a steady drip and about 2 ounces of BBQ lighter fluid. I have a small propane torch to actually give flame.

I have made a change to the drip system that makes it easier to see how much oil is feed to the burner. I will post detail and pics tonight.

Any other questions feel free to ask.

12
User Projects & Pictures / Re: My hooptie
« on: November 24, 2010, 12:15:38 pm »
There is should be a 4 inch pipe from the top center of the tank to about 8 inches from your burner. The flue should be off to the side. Air will be pulled on top of the flame causing it to flower and heat the sides of the tank.

13
User Projects & Pictures / Re: My Roger Sanders Waste Oil Heater
« on: January 17, 2010, 02:44:37 pm »
By the time I finished the heater last year, winter was pretty much over. The heater did okay but I noticed when the fire was at its hottest I had to close the intake more. This was counter productive as it would lower the flame and the puddle would grow. This Christmas weekend I was working in the garage and we had a cold front move through that lowered the temps to 0. So I fired up the heater and went into the balancing act trying to keep the fire at peak and not smothering it with little air. I was becoming frustrated as I was spending more time with the heater than on the work I had to do, and the garage really never warmed up. During some of the adjustments I opened up the intake and noticed the fire would clear out from the center and turn white on the outer edges of the plate. I could also see a wall of smoke over the plate with just a inch of clear air hitting the plate.

The fix, remove the 3 inch tube and install a 4 inch tube just as Roger Sanders has in his. I finished today to just as the temps got to 50 deg, and lit it up.  What a difference a perfect flame no mater how much oil is fed into the heater. It no longer overflows because the oil burns before it can. Dang should have done this last year.

14
User Projects & Pictures / Re: Gorram's RS Heater
« on: November 09, 2009, 07:13:24 am »
Your unit looks great. From last year to now my Roger Sanders unit still works great. I started her up again a couple of weeks ago.

15
User Projects & Pictures / Re: Here's my project...coming along.
« on: February 17, 2009, 07:06:58 am »
A little paint and that thing will look great.

Pages: [1] 2